Log in
Reset password
Create an account
Your bag(0)
Your cart is empty
Continue ShoppingSearch

Getting the perfect fit for your metal watch strap is about more than just comfort—it's about making sure your watch sits securely and correctly on your wrist. To get it right, you'll need to figure out what kind of strap you have, grab a few simple tools, and then either pop out some links or tweak the clasp. It's a surprisingly straightforward job you can usually knock out at home in under 30 minutes.
Your Guide to a Perfectly Fitted Metal Watch Strap
There's nothing more annoying than a watch that's too loose or too tight. A sloppy fit doesn't just feel wrong; it can cause unnecessary wear and tear on the bracelet, and worse, you risk having the watch slip right off your wrist. Taking a few minutes to adjust it properly makes your timepiece feel like it was made just for you.
This guide will walk you through everything you need, whether you're dealing with a classic link bracelet, a sleek Milanese mesh strap, or a modern smartwatch strap. We'll start by identifying the most common types of metal straps and the basic tools that make the job a breeze. After that, I'll show you how to measure your wrist properly—the crucial first step to figuring out exactly what needs to be adjusted.
Why Bother Adjusting Your Own Watch Strap?
Learning to adjust a metal watch strap at home gives you the power to get that perfect fit whenever you want, without a trip to the jeweller. It's become a really common DIY task here in the UK. In fact, it's estimated that around 75% of people now prefer to adjust their own straps, largely because you can pick up a decent adjustment kit for just £10 to £25. It's a small investment that pays off every time you get a new watch.
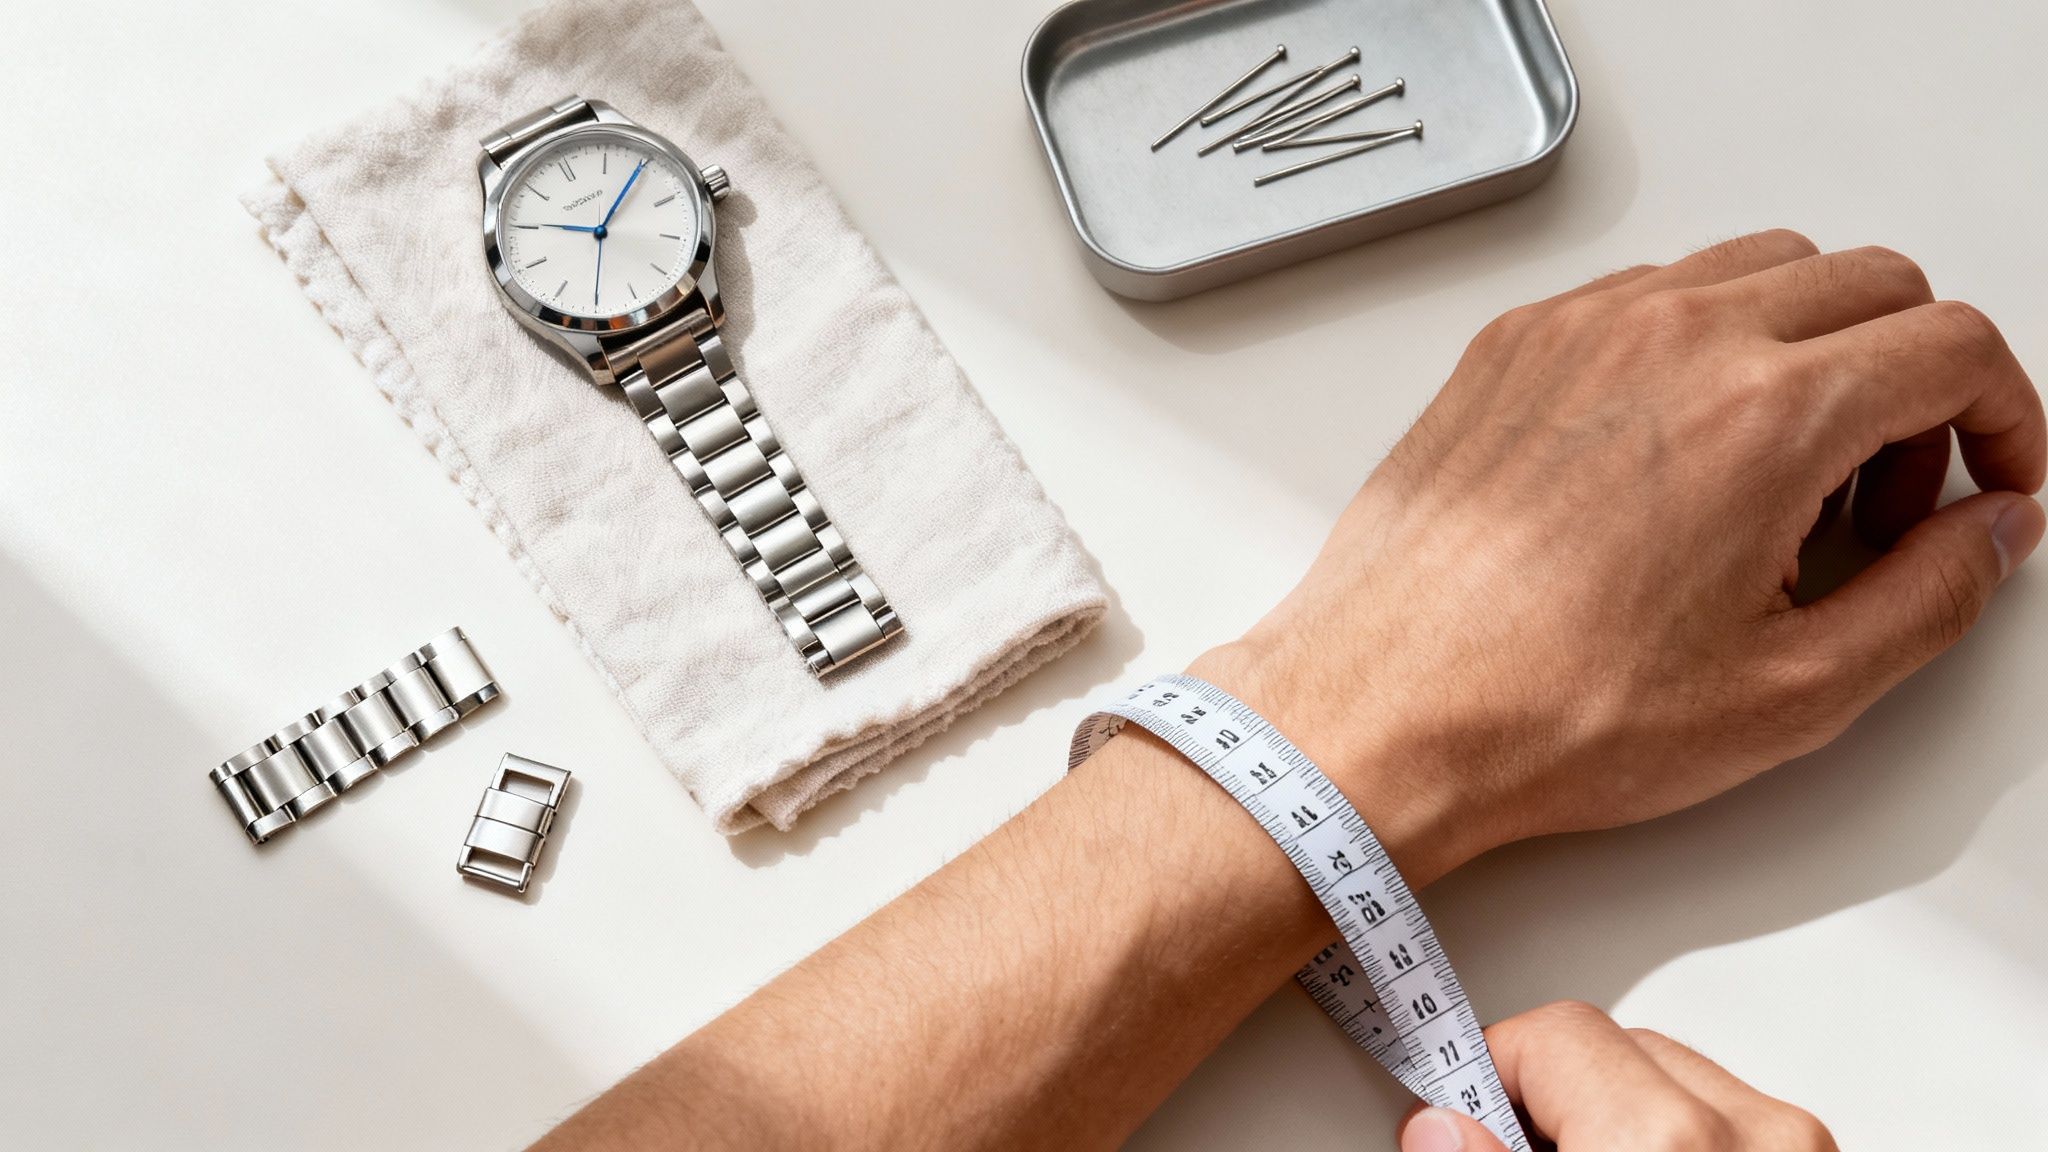
A good rule of thumb for the perfect fit: you should just be able to slide one finger between the strap and your wrist. This gives you enough room for your wrist to naturally expand during the day, but it's still snug enough that your watch won't be spinning around.
This guide will cover all the essentials to get you started:
- Identifying Your Strap Type: We'll look at the common ones like link bracelets, Milanese mesh, and fold-over clasps.
- Gathering the Right Tools: A few simple items will make the process smooth and save your watch from scratches.
- Measuring for a Custom Fit: Getting this right from the start is the key to all-day comfort.
If you run into specific questions about whether a strap will fit your watch or need more sizing details, you can always check out some detailed FAQs about watch straps to clear things up before you start tinkering.
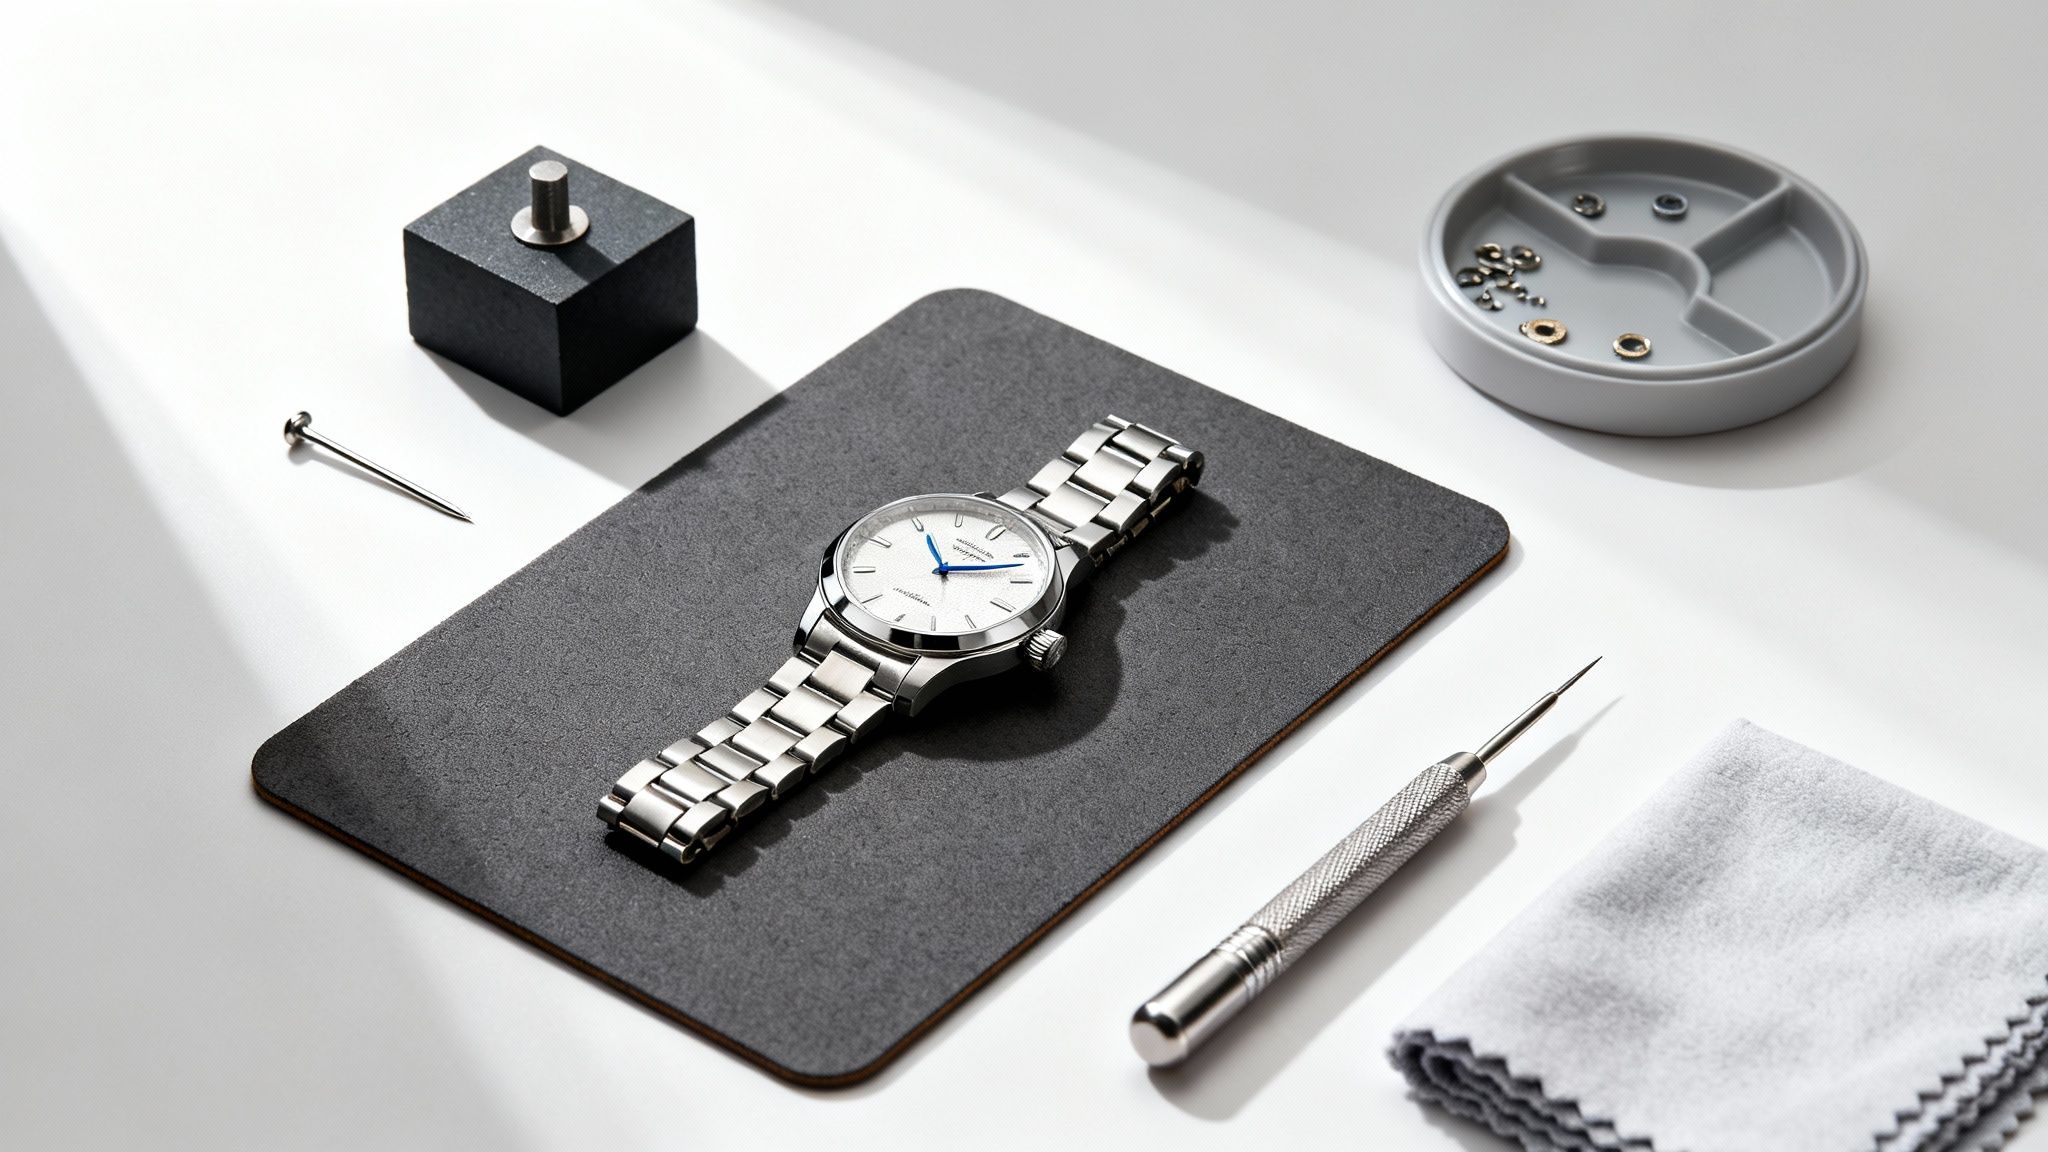
Setting Up for a Scratch-Free Adjustment
Before you jump in and start tinkering with pins or screws, a little bit of prep work is your best friend. It’s what separates a clean, professional job from a scratched-up mess. Think of it like a surgeon preparing their operating theatre – having a clean, organised space is half the battle.
First things first, find a flat, stable surface with good lighting. A desk or even the kitchen table will work just fine. The most important thing is to protect your watch, so lay down something soft. A microfibre cloth, a dedicated watchmaker's mat, or even a neatly folded tea towel will create a safe cushion, preventing any accidental slips from scratching the crystal or case.
Sizing Up the Situation
With your workspace sorted, it's time to work out how many links you actually need to remove. Pop the watch on your wrist and pinch the bracelet together underneath until it feels right. You're looking for a snug fit, not a tight one, where the watch head stays put without spinning around. Count the number of spare links you've gathered up—that's your target for removal.
Pro Tip: Balance is everything. If you need to remove four links, it's best to take two from each side of the clasp. For an odd number, say three, take two from the 6 o'clock side and just one from the 12 o'clock side. This simple trick keeps the clasp perfectly centred on the underside of your wrist, making it much more comfortable to wear all day.
Identifying Your Bracelet System
Now, have a proper look at the inside of your watch bracelet. You’ll spot the tiny details that tell you how the links are held together. Figuring out which system you're working with is crucial, as it dictates the tools and techniques you'll need to use.
This kind of aftermarket watch servicing is a massive part of the UK's thriving watch industry. Valued at around USD 3.05 billion each year, the market depends on these components for both new assemblies and everyday repairs. In fact, many of the 1,600+ jobs in the British watchmaking sector involve exactly this kind of hands-on work. You can find more fascinating data on the wider European market over at IndexBox.io.
You’ll most likely encounter one of these three common systems:
- Friction Pins: By far the most common. You'll see little arrows engraved on the inside of the removable links. These show you which direction to push the pin out.
- Split Pins: These look like tiny cotter pins and are held in by tension alone. They come out the same way as friction pins—just follow the arrows.
- Screws: Often found on more premium bracelets. These use tiny flat-head screws to connect the links. You’ll need a proper jeweller’s screwdriver set for these.
Once you know what you’re dealing with, you can confidently grab the right tool and get on with the adjustment.
Getting Hands-On: Removing Links from Your Watch Bracelet
This is where we get down to the nitty-gritty, turning that loose-fitting accessory into a watch that feels like it was made just for you. Taking links out of a standard bracelet is the most common adjustment you'll ever need to do, and it's incredibly satisfying once you know how.
First things first, flip the bracelet over and have a good look. Most bracelets with pins have tiny arrows engraved on the links near the clasp. These aren't just for show – they're your instructions, pointing in the exact direction you need to push the pin out. Always follow the arrows. Trying to force a pin out the wrong way is a surefire recipe for a stuck pin and a damaged bracelet.
Pushing Out Pins the Right Way
With the direction sorted, it's time to grab your main tool. For this job, a proper pin pusher tool or a link removal block is your best friend. They're built to apply steady, even pressure, which is worlds better and safer than fumbling with a paperclip or a thumbtack.
Set the bracelet in your tool, making sure the pusher is lined up perfectly with the pinhole. Now, slowly and steadily turn the handle. You'll feel a little 'pop' as the pin starts to give way. Push it just far enough so you can get a grip on the other end with a pair of small pliers and pull it the rest of the way out. Patience is key here; slow and consistent pressure wins the day.
Pro Tip: Keep Your Workspace Contained
I can't stress this enough: work over a small tray or even a shallow bowl. Watch pins, and the tiny collars that sometimes go with them, are masters of disguise and love to roll off into oblivion. A contained space will save you from the inevitable frustration of searching your floor for a tiny, missing piece of metal.
What If There Are Screws Instead of Pins?
No arrows? You’ve likely got a bracelet held together by tiny screws, a system you’ll often find on more premium watches. For this, you’ll need a good set of jeweller's screwdrivers.
The most important step is to choose a screwdriver bit that fits the screw slot perfectly. Using one that's too big or too small is the number one reason people strip screws, turning a five-minute job into a major headache. Apply firm, gentle pressure straight down to keep the driver from slipping, and turn it anti-clockwise. It's all about controlled torque, not speed. If you want a more detailed walkthrough for all kinds of straps, our article on how to remove links from a watch strap has you covered.
Putting It All Back Together
Once you've taken out a link or two, putting the bracelet back together is just as simple – you're just doing everything in reverse. Line up the two ends of the bracelet you want to connect.
- For Bracelets with Pins: Slide the pin back into the hole, but this time, push it in against the direction of the arrow. You should feel it click or seat firmly when it's all the way in. A light tap with the flat end of your pin tool or a small nylon hammer can help get it perfectly flush.
- For Bracelets with Screws: Just thread the screw back in and tighten it until it’s snug. Be careful not to go overboard and overtighten, as you could strip the threads.
Give the reconnected link a gentle tug to make sure it's secure. Now, pop the watch back on. It should sit comfortably on your wrist, perfectly fitted and ready to go.
Alright, let's move beyond bracelets with pins and screws. Not every metal strap needs a link taken out to get the perfect fit. Some of the most popular and comfortable styles, like Milanese mesh, use a completely different, and often much simpler, system.
Milanese straps, with their classic woven look and incredible flexibility, are a fantastic choice. At first glance, figuring out how to adjust one can seem a bit mysterious since there are no visible links to pop out. But once you know the trick, it’s genuinely one of the easiest adjustments you can make. It's no wonder they’re so popular with modern smartwatches, where that seamless, sleek appearance is everything.
In fact, some of the best modern options, like this magnetic Milanese loop for the Apple Watch, have done away with clasps altogether, giving you infinite adjustability without a single tool.
For bracelets that do use links, the core process is always the same: find the right pin, push it out, and reconnect the bracelet.
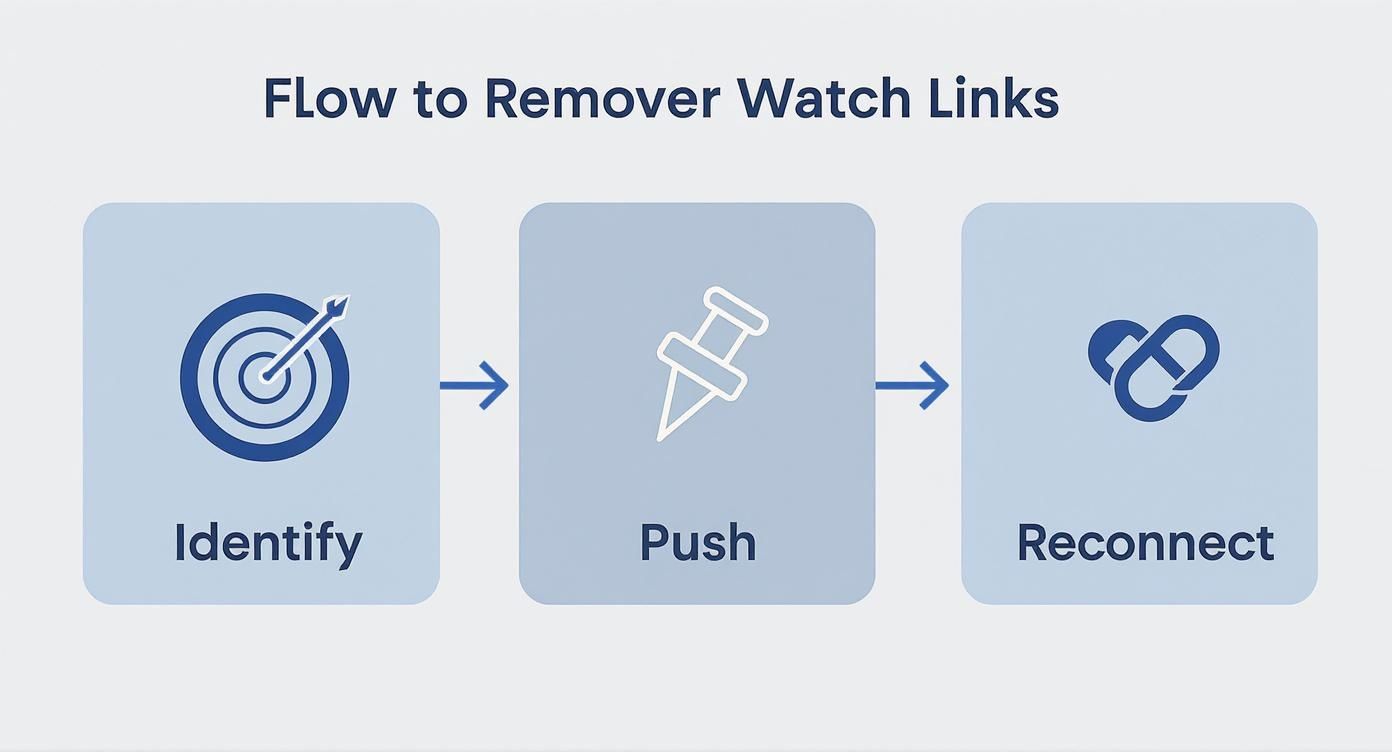
This simple flow is the foundation for most metal strap adjustments, but mesh straps and micro-adjustments offer a different path to that perfect fit.
How to Adjust a Mesh Strap Clasp
To get a traditional mesh strap fitting just right, all you really need is a tiny flat-head screwdriver or a similar flat, sturdy tool. I’ve even used the corner of a small key in a pinch.
- Find the locking gate: Take a look at the clasp. You’ll spot a small rectangular piece that clamps down onto the mesh itself. It usually has a little arrow or a slot in it.
- Pop it open: Gently slide the tip of your tool into that slot and carefully pry upwards. You’ll feel a little resistance, then it will pop open with a satisfying click.
- Slide for the perfect fit: With the gate open, the entire clasp assembly can now slide freely along the length of the mesh strap. Move it up or down until you find the right spot.
- Lock it down: Once you’re happy with the position, press the locking gate firmly back down. Make sure it snaps shut and sits completely flush with the rest of the clasp. That's it!
Comparing Adjustment Methods for Metal Straps
Here’s a quick look at how the different adjustment techniques stack up against each other. It helps to know what you're getting into before you start.
| Strap Type | Primary Adjustment Method | Difficulty Level |
|---|---|---|
| Mesh (Milanese) | Sliding a locking clasp mechanism | Easy |
| Pin & Collar | Removing links using a pin pusher tool | Medium |
| Screwed Links | Removing links with a small screwdriver | Medium-Hard |
| Magnetic Loop | Sliding the magnetic end to any position | Easiest |
As you can see, while none are impossible for a DIYer, some methods are definitely more straightforward than others.
The Secret Weapon: Micro-Adjustments
Now for my favourite trick, and something that every watch owner should know about: the micro-adjustment. Have you ever been stuck where removing a full link makes the bracelet way too tight, but leaving it in makes it just a bit too loose? That’s where the tiny holes inside your clasp become your best friend.
These little holes let you make very small changes to the bracelet’s length without touching the links at all.
Using a spring bar tool, you just compress one end of the spring bar connecting the bracelet to the clasp and shift it over to an adjacent hole. Moving it further into the clasp tightens the fit, while moving it towards the end of the clasp loosens it. Simple.
This tiny tweak is often the final step to achieving a truly perfect, custom fit. It’s brilliant for accommodating the natural swelling of your wrist on a hot day or after a workout.
With the UK's wearable tech market projected to hit around £1.29 billion by 2025, these skills are more useful than ever. More and more smartwatches are being sold with premium metal straps, and knowing how to adjust them yourself means your high-tech device will not only work perfectly but feel like it was made just for you.
Troubleshooting Common Problems
https://www.youtube.com/embed/4WfSqQzfNmo
Even when you follow the instructions to the letter, adjusting a metal watch strap can sometimes throw you a curveball. It happens to everyone. The trick is knowing how to navigate these little hiccups without scratching your strap or, worse, damaging your watch.
Let's walk through some of the most common snags you might hit, from stubborn pins to finicky screws.
One of the most frustrating things is a pin that just won't budge. You've got your tool lined up perfectly, you're applying firm, steady pressure, but it’s not moving an inch. Before you even think about reaching for a hammer, stop and double-check you're pushing in the direction of the tiny arrows on the inside of the links.
If you’ve got the direction right, the pin might just be seated very tightly from the factory. For a bit more controlled force, try gripping the handle of your pin pusher with a small pair of needle-nose pliers. This gives you a much better grip and more leverage. A tiny drop of lubricating oil right on the pinhole can also make all the difference, but be very sparing with it.
Dealing with Difficult Screws and Clasps
Another classic problem is a miniature screw that feels like it's about to strip the second you try to turn it. This almost always means your screwdriver bit isn't the right fit. If you feel it start to slip, stop immediately. Make sure you're using the correct size flat-head bit and apply firm downward pressure as you turn to keep the driver securely in the slot.
Got a really stubborn screw? A little heat can be your best friend. A quick 5-10 second blast from a hairdryer is often just enough to expand the metal and break the seal of any thread-locking compound used at the factory.
Sometimes the problem only shows up after you've put everything back together. You go to click the clasp shut, and it just doesn’t feel secure or won't lock at all.
- Check the spring bar: Take a close look at the spring bar that connects the final link to the clasp itself. Is it properly seated in the holes on both sides? If it’s even slightly out of place, the whole mechanism will be misaligned.
- Inspect for debris: It’s amazing how a tiny bit of grit or a metal shaving can jam up a clasp. Give the mechanism a quick clean with a soft, dry brush to clear out anything that might be blocking it.
- Confirm link alignment: Look at how the links flow into the clasp. If one is twisted or binding, it can prevent the clasp from closing properly.
Knowing when to stop is just as important as knowing where to start. If you find yourself needing to apply serious force, or if you're working on a high-end watch with a bracelet that costs a small fortune, it's always best to put the tools down. Taking it to a professional watchmaker is a far smarter move than facing a hefty repair bill.
Your Watch Strap Adjustment Questions Answered
Even with a step-by-step guide in hand, it’s natural to have a few questions when you’re resizing a metal bracelet for the first time. I’ve run into plenty of little quirks myself over the years. Here are some of the most common questions that pop up, with answers drawn from real-world experience.
How Tight Should a Metal Watch Strap Be?
This is all about finding the sweet spot between secure and comfortable. Your watch should be snug enough that the head doesn't flop around or spin on your wrist, but it absolutely shouldn't be digging into your skin or cutting off circulation.
A good old-fashioned rule of thumb is to see if you can slide your little finger between the clasp and your wrist. This usually leaves just enough room for your wrist to naturally expand and contract with temperature changes or activity, preventing the watch from feeling like a vice grip by the end of the day. If it’s leaving deep imprints, it’s far too tight.
Can I Adjust Any Metal Watch Strap Myself?
For the most part, yes. Most bracelets you'll encounter, especially those with standard pin-and-collar systems (look for the little arrows on the back of the links) or the ones held together by tiny screws, are designed to be adjusted at home. With a basic watch tool kit, you're good to go.
However, be cautious with some high-end luxury brands, as they sometimes use proprietary mechanisms that demand special tools. Also, watches with fully integrated bracelets—where the strap flows seamlessly into the watch case—can be a real headache.
When in doubt, especially with a valuable or sentimental watch, take it to a professional. The small cost for a watchmaker's expertise is well worth the peace of mind.
What if the Fit Is Between Two Link Sizes?
Ah, the classic dilemma. You take out a link and it's too tight, but you put it back in and it's too loose. The solution is almost always hiding right on the clasp itself.
Take a close look at the side of the clasp where the bracelet joins it. You should see a row of 2-4 small holes. These are for micro-adjustments. Using your spring bar tool, you can pop the spring bar out and move it to a different hole to make those tiny changes that dial in the perfect fit. It's the secret to getting it just right.
Which Side of the Clasp Should I Remove Links From?
Balance is everything for a comfortable fit. You want the clasp to sit nicely centred on the underside of your wrist. To achieve this, always try to remove an equal number of links from both the 6 o'clock and 12 o'clock sides of the bracelet.
But what if you need to remove an odd number, say, three links? The common practice is to remove two from one side and one from the other. Take the extra link from the 6 o'clock side. This side is often shorter to begin with, and taking one more from here helps keep the watch head balanced and centred on top of your wrist.
Ready to give your smartwatch a fresh new look? At Nothing But Bands , we offer a huge selection of high-quality metal, silicone, and nylon straps for all major brands. Find your perfect style and enjoy premium comfort and durability today at https://nothingbutbands.com .