


You've got the replacement band in one hand, the watch in the other, and no idea whether to slide, twist, press, or reach for a tool. Changing a watch band isn't one job. It's four different fitting systems, and the fastest safe swap starts by identifying the connector on the underside of the case.
Apple Watch bands slide into a proprietary channel. Garmin QuickFit bands lock onto the watch with a latch. Fitbit and Samsung's newest watches use brand-specific release fittings. Traditional watches use spring bars, either with a built-in quick-release lever or a separate tool. Identify the fitting first, then use the matching motion. Guessing from the strap's shape is how people waste time and scratch lugs.
Table of Contents
- Changing a Watch Band Is Really Four Different Jobs
- How to Tell Which Fitting Your Watch Uses
- The Change for Each of the Four Fittings
- What You Need to Swap a Band
- A Daily Rotation Routine That Takes Seconds
- Common Problems and How to Fix Them
- Choosing the Right Band Material for the Job
Changing a Watch Band Is Really Four Different Jobs
The strap material can fool you. A nylon, leather, silicone, or metal band may look similar at the case, but the mechanism holding it in place determines everything. Look at the watch case, not the strap, before you try to remove anything.
The four common jobs are:
- Apple slide-in lugs, released by holding the band release button on the back of the watch and sliding the band sideways out of its slot.
- Garmin QuickFit, released by sliding open the latch on the band and lifting the band off the watch.
- Brand-specific Fitbit and Samsung connectors, released through a button, lever or tab designed for that model family.
- Traditional spring bars, compressed with a fingernail on a quick-release bar or with a forked spring-bar tool on a standard bar.
Those systems don't share the same failure mode. Pulling an Apple band straight out can damage the channel. Forcing a QuickFit band before the latch is open strains the pin. Forcing a brand-specific connector before its release has cleared can bend it. Levering a spring-bar tool against the case can leave scratches.
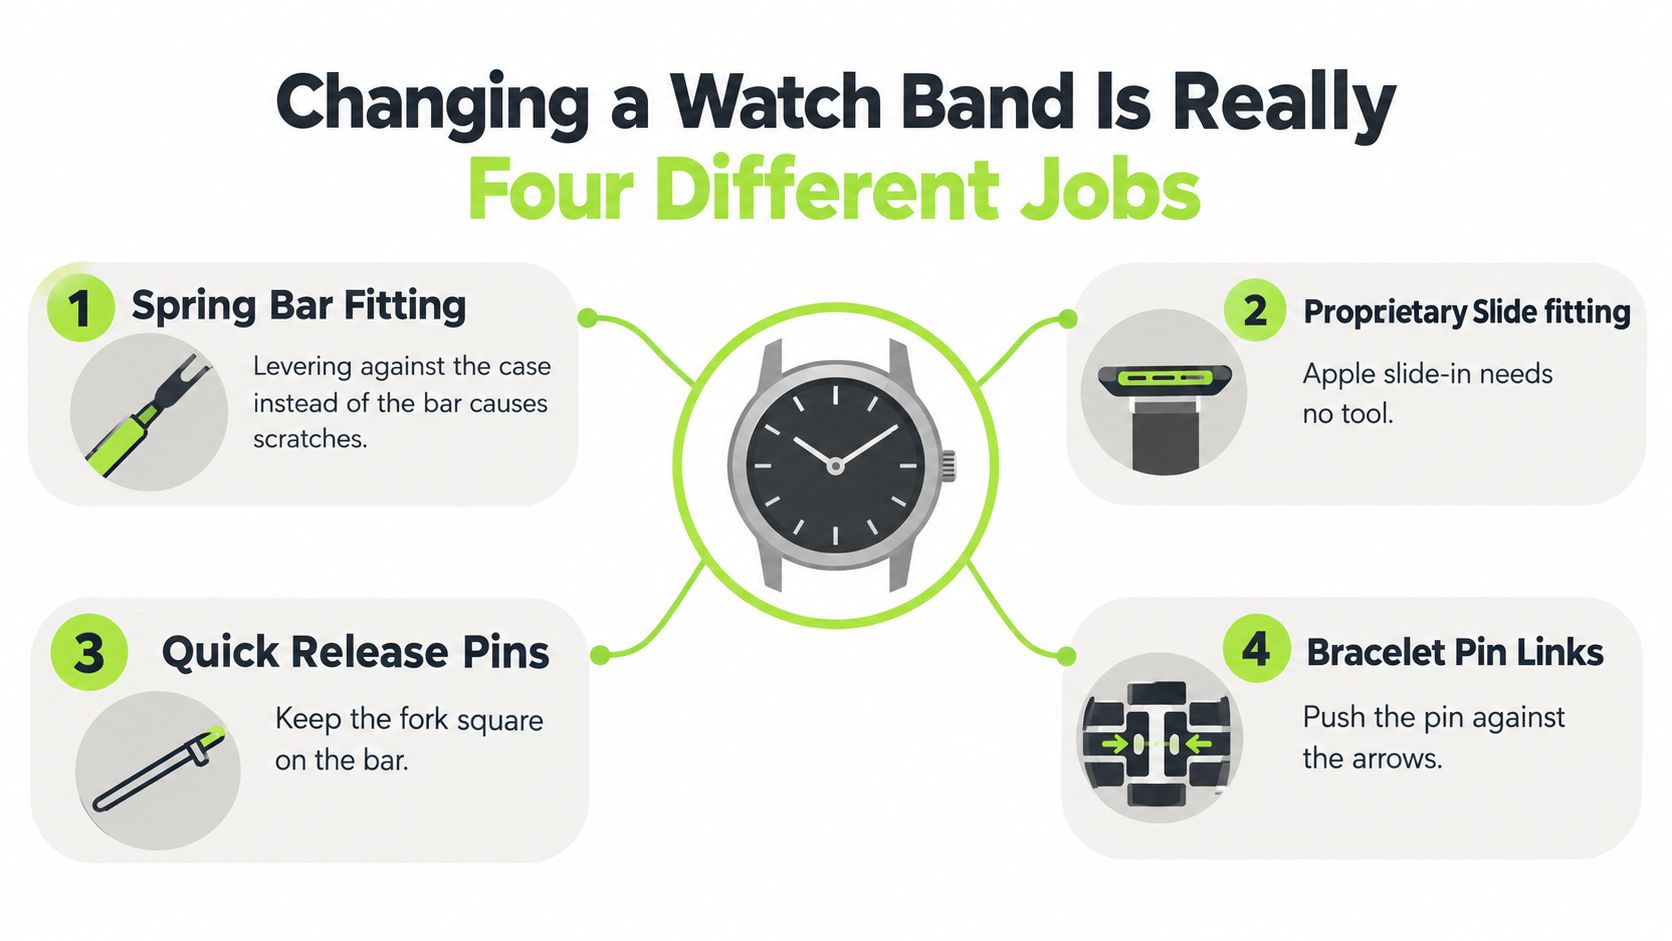
Practical rule: Start with the watch face down on a soft cloth. Your first question is “What fitting is on this case?” not “What tool do I have?”
Once you know the fitting, the job becomes simple. You're looking for one deliberate movement and one clear confirmation, usually a click or a secure tug test. That discipline matters more than speed, especially when changing watch bands between leather for the office, nylon for travel, and sport materials for exercise.
How to Tell Which Fitting Your Watch Uses
You can identify most watch-band fittings by inspecting the underside of the watch case and the two connector ends before touching the strap. Put the watch face down on a clean, padded surface and use a fingernail or magnifying glass for inspection, not a knife or screwdriver.
Look for these tells:
- Recessed sliding channel: Apple Watch cases accept bands through a horizontal slot. The connector slides sideways, and an oval band release button sits on the back of the watch case next to each slot.
- QuickFit latch: Garmin QuickFit bands carry a small latch on the band end that closes over a pin on the watch. QuickFit comes in 20, 22 and 26 mm widths, and it is not the same thing as an ordinary quick-release band, which is a common source of confusion.
- Brand-specific release: Fitbit is especially difficult to identify by appearance alone because Charge, Versa and Sense families use different release mechanisms. Samsung Galaxy Watch4 to Watch7 models take 20 mm bands on quick-release spring bars, while Galaxy Watch Ultra and Watch8 use Samsung's own Dynamic Lug system.
- Traditional spring bar: A thin metal bar bridges two drilled lugs. You may see the bar ends through the lug holes, or find a small lever on the underside of a quick-release strap.
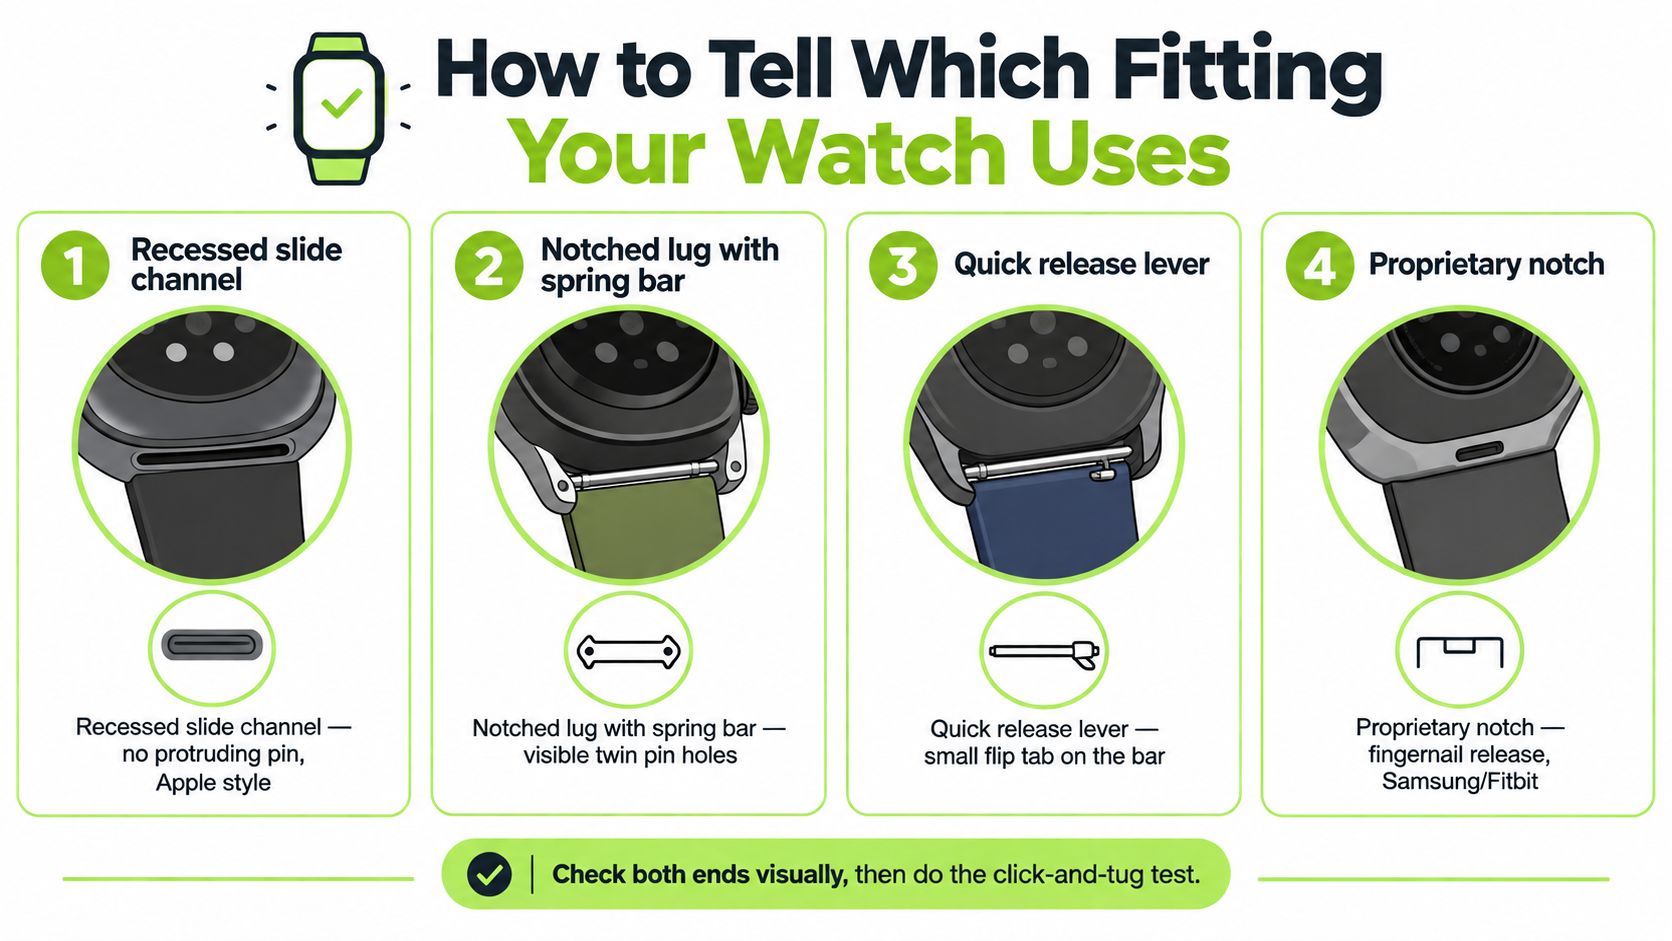
The second check is lug width, measured between the lugs in millimetres. Standard replacement bands commonly use 20 mm or 22 mm lug widths, and the spring bars must match the same width. Record the fitting and width together, such as “traditional spring bar, 20 mm.”
Apple Watch works differently. Bands are chosen by case size, in two groups: smaller cases (38, 40 and 41 mm, plus the 42 mm Series 10) and larger cases (the older 42 mm, 44, 45 and 46 mm, plus the 49 mm Ultra).
Once you know the fitting and size, confirm both ends visually and finish with the click-and-tug test.
The Change for Each of the Four Fittings
Each fitting has a different hand motion. Keep the action controlled, and stop immediately if the connector doesn't move in the direction it was designed to move.
Apple slide-in lugs. Turn the watch over, hold down the band release button on the back of the case, and slide the band sideways out of the slot. To fit the new one, make sure the text on the band faces you and slide it in until you feel and hear a click. If the band won't slide, press and hold the release button again instead of pulling harder.
Garmin QuickFit. Slide the latch on the band open and lift the band away from the watch. To fit the replacement, line it up with the watch, press it into place and make sure the latch closes over the watch pin. Then give both ends a light tug.
Fitbit and Samsung brand-specific fittings. Press the release button or lever on the band end, then slide or lift the connector out as that model is designed to move. Install the new band the same way in reverse and let the release return to its locked position. A flush connector and a firm tug confirm that it is seated. On Samsung Galaxy Watch4 to Watch7, the band is really a 20 mm quick-release spring bar; Galaxy Watch Ultra and Watch8 need Dynamic Lug bands.
Traditional spring bars. A standard spring-bar strap requires the bar to be compressed so its tip clears the lug hole. A quick-release spring bar may have a small lever that you move with a fingernail, while a conventional bar needs the right tool. Remove and install one side at a time, never levering against the case, and finish by checking both ends and tugging the strap before wearing it. Removing links from a metal bracelet is a separate sizing job, not a band change.
| Fitting | Removal motion | Confirmation | Most common mistake |
|---|---|---|---|
| Apple slide-in | Hold the release button on the watch and slide sideways | Band clicks into the slot | Pulling straight out |
| Garmin QuickFit | Slide the latch open and lift the band off | Latch closes over the watch pin | Forcing it with the latch still closed |
| Fitbit or Samsung brand-specific | Press the button or lever, then slide or lift | Release returns and the connector sits flush | Forcing the connector before it releases |
| Traditional spring bar | Release with the integrated lever or spring-bar tool | Spring bar seats in both lug holes | Levering against the case |
What You Need to Swap a Band
A clean swap starts with the fitting, not the tool. Apple slide-in and Garmin QuickFit bands change by hand, while many quick-release spring bars use a fingernail-operated lever. Fitbit and Samsung fittings usually need only the correct release and a steady grip. Match the replacement to the case before ordering, or no tool will rescue the wrong connector.
For traditional spring bars, keep a double-ended spring-bar tool in the drawer: forked on one end, pointed on the other. The forked end compresses common bars, while the pointed end helps in narrow spaces, which makes it practical for metal and leather straps alike. Work over a soft cloth, keep the fork square on the bar, and compress inward rather than scraping the case. Our separate spring-bar tool guide covers the full motion.
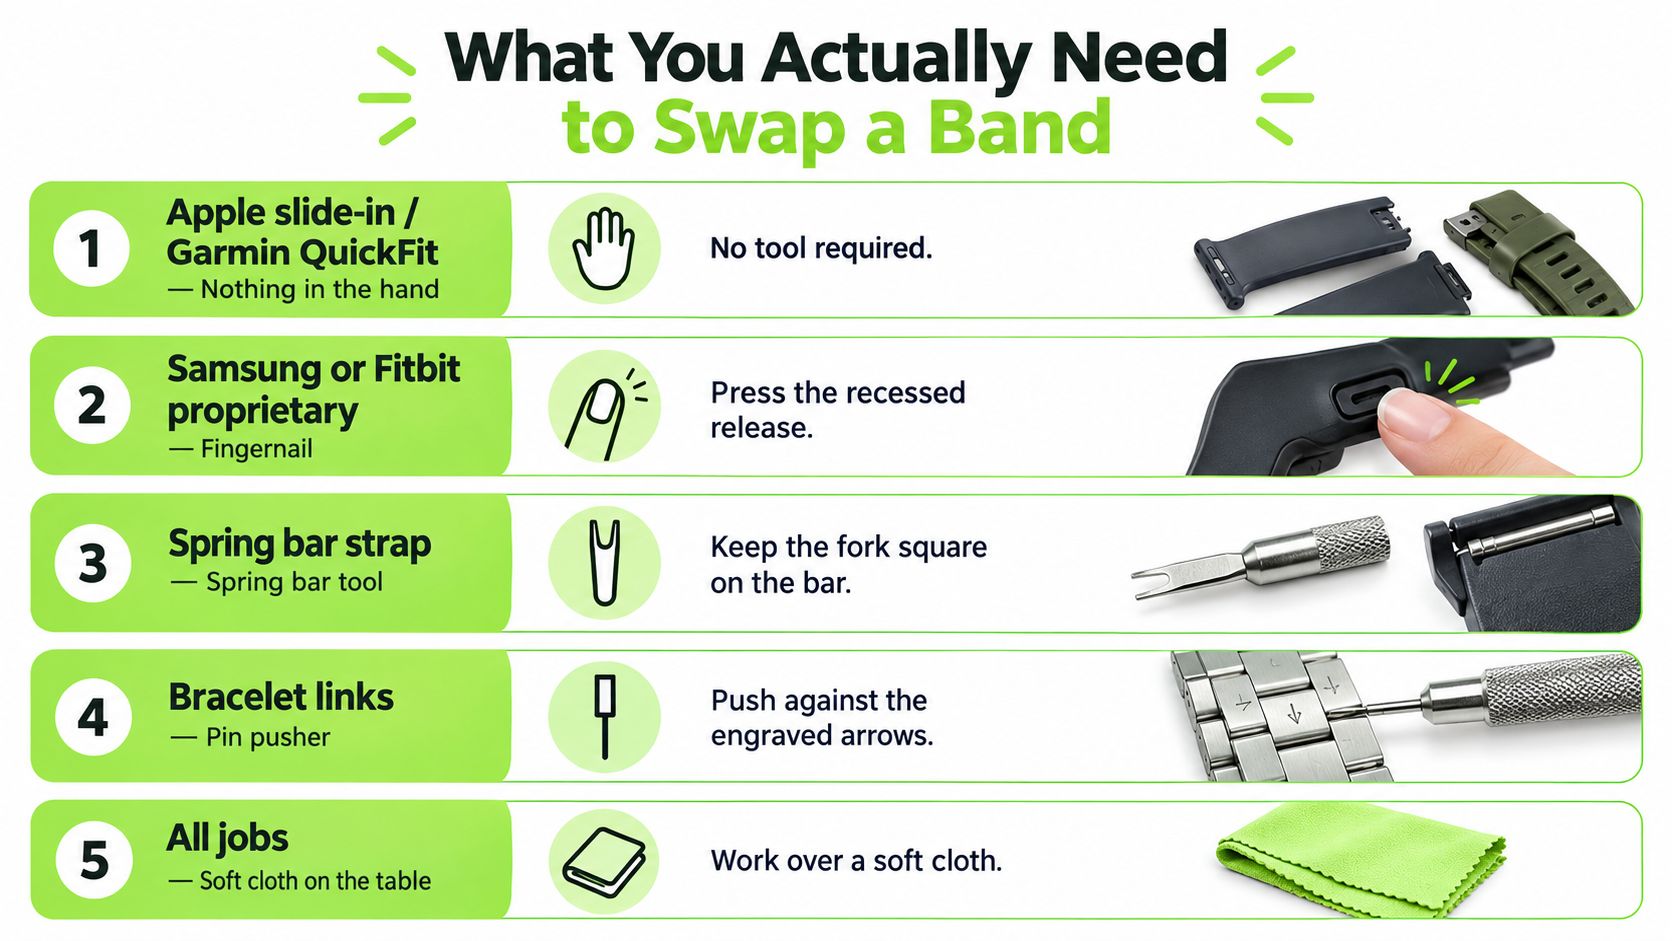
Your practical kit is small:
- Soft microfiber cloth: Protects the case and catches loose spring bars.
- Correct replacement bands: Verify the model and fitting before buying.
- Spare spring bars: Keep matching replacements for traditional bands, especially with leather or nylon rotation.
- Double-ended tool: Choose a forked end and pointed end instead of a bulky multipurpose kit.
Skip pin punches unless you are sizing bracelet links. Skip lubricant and glue. A kitchen knife or screwdriver belongs nowhere near a spring bar.
Move each connector the way it was designed to move. Apple bands slide sideways out of the slot, QuickFit bands lift off once the latch is open, and brand-specific releases follow their own slide or lift path. A fitted spring-bar strap should resist a gentle pull away from the case without shifting.
If the watch is not a standard smartwatch, identify it before buying. A dedicated product such as a replacement strap for basal thermometer may use a fitting unlike a regular watch lug.
For a tool-free 22 mm rotation, a magnetic Milanese band on quick-release spring bars needs no tool at all, and its adjustable closure suits wrists that change through the day.
A Daily Rotation Routine That Takes Seconds
The fastest daily routine is boring, repeatable, and done at a table. Take the watch off, place it face down on a soft cloth, and keep the replacement band beside the case. Remove the top lug first, then the bottom lug, so you're never wrestling with two loose ends at once.
Fit the new band from the bottom lug first. Keep the other strap end loose until the first connector is fully seated, then install the second side without forcing it. For Apple Watch bands, hold the release button on the back of the watch and slide the band out and in. For a spring-bar strap, work one end at a time and watch the bar rather than pushing blindly.
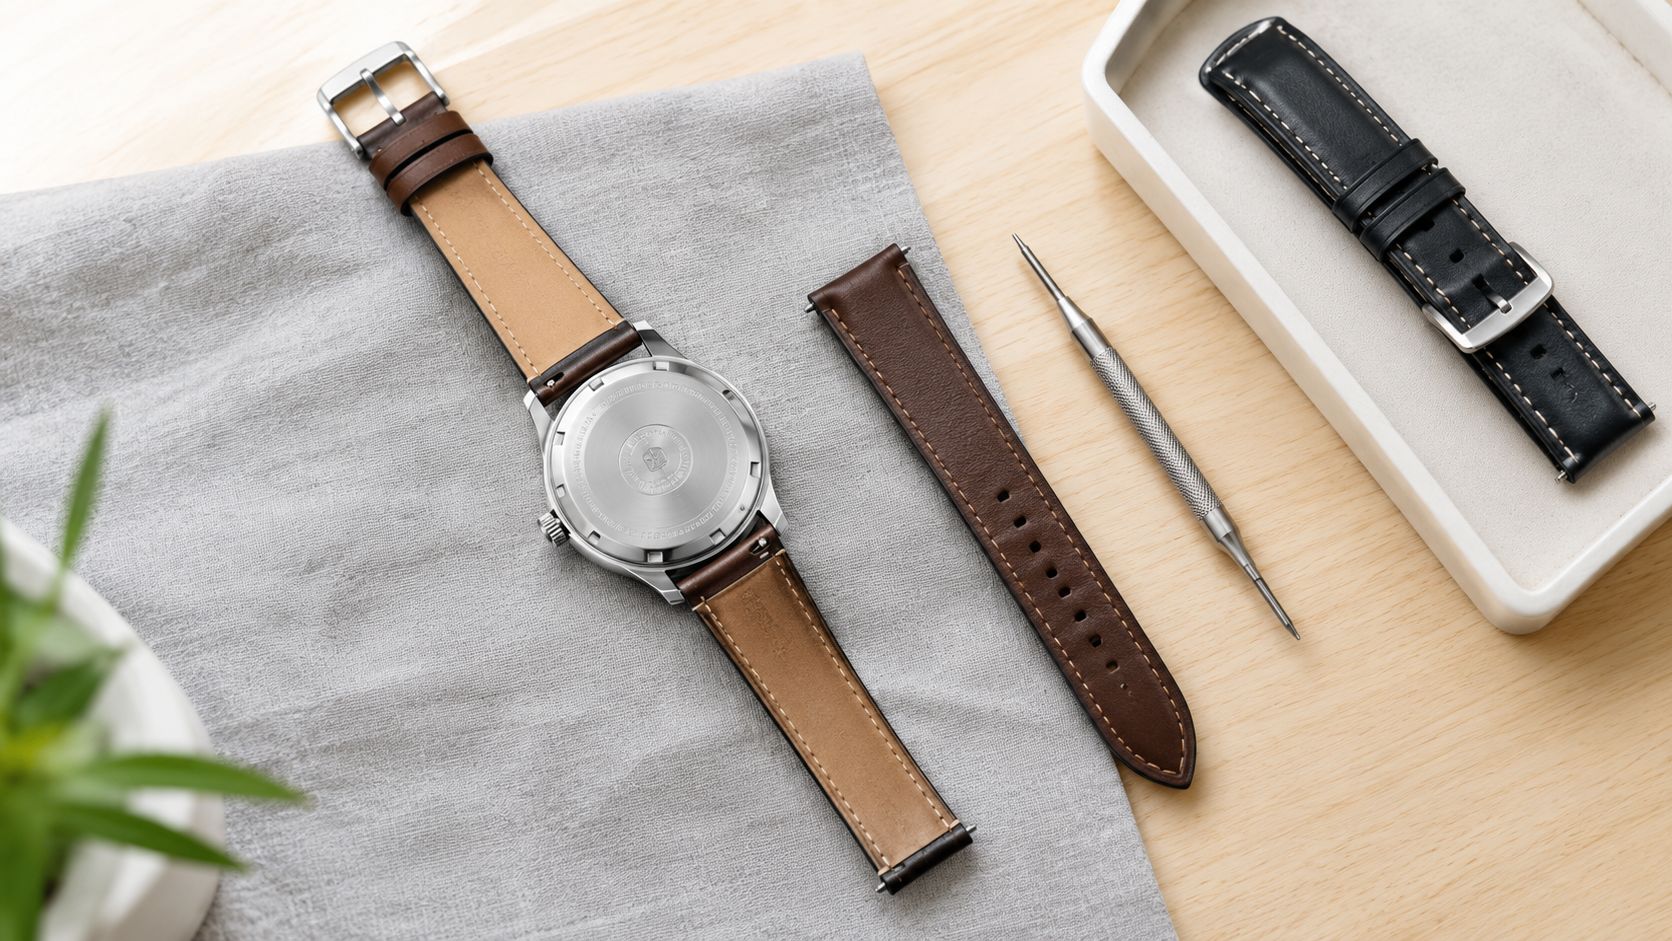
The click-and-tug test: Check both ends visually, then pull each strap end gently away from the case. If the connector shifts, stops, or releases, remove it and reseat it before the watch reaches your wrist.
Storage makes frequent changing watch bands easier. Use a shallow tray or drawer grouped by watch and fitting, then sort ordinary bands by 18 mm, 20 mm, and 22 mm. Label pouches so you don't mistake a standard quick-release band for Garmin QuickFit. Keep leather separate from damp sport bands, and place spare pins or links in a small labelled bag instead of leaving them loose in the drawer.
Wipe the removed band before storing it. Nylon and sport materials shouldn't sit wet against leather, metal, or another textile.
Common Problems and How to Fix Them
In practice, most problems I hear about are fitment, not a difficult mechanism: the wrong width, the wrong watch model, or a band that looks attached but hasn't actually clicked into place. A 22 mm band on a 20 mm lug can look nearly right, but it won't seat securely. Measure the distance between the lugs in millimetres and order the matching width, including matching spring bars. Don't try to close a visible gap by forcing the connector.
The second cause is a wrong model within the same brand. On Apple Watch, people often confuse the case size with the band family: a band for the 49 mm Ultra fits the larger case group, but not a 40 or 41 mm case. Samsung Galaxy Watch Ultra and Watch8 use Dynamic Lug bands rather than the 20 mm spring bars of earlier models. A familiar brand name doesn't guarantee a compatible connector, so check the exact model and case size before buying.
A partial click means one end has seated while the other remains outside the lug hole. Press the opposite end into position while watching for the second seating point. If a band looks aligned but fails the tug test, treat it as unsecured.
| Symptom | Root cause | Fix | Most common with |
|---|---|---|---|
| Band appears too wide | Wrong lug width | Measure between the lugs and match the band and spring bars | Traditional spring bars |
| Connector won't slide | Release button isn't held down or model is wrong | Stop forcing it and verify the fitting and model | Apple Watch |
| One side releases during tug test | Partial seating | Reseat both ends and confirm the second click | Quick-release and spring bars |
| Scratches around the lugs | Tool is levering against the case | Push on the spring-bar tip, not the case | Traditional spring bars |
| Irritation or discolouration | Moisture, residue, coating wear, or trapped grit | Rinse with warm soapy water, dry fully, and loosen the fit | Sport and coated bands |
A stuck band is usually dried sweat, sunscreen or soap in the channel, not a reason to force it. Clean the band and connector area with warm soapy water, then dry everything before trying again. If irritation continues, switch materials rather than wearing the band tighter.
For someone changing several times a day, I would favour Apple slide-in, quick-release, Milanese or hook-and-loop bands; plain spring bars become tiresome when you are constantly swapping. Debra Nelson, reviewing the Véllo — Nylon Loop — Quick Release 20mm, put the practical advantage simply: “It’s super easy to attach and detach; no fuss at all, which is a big plus for me as someone who tends to change things up a lot.”
Choosing the Right Band Material for the Job
Choose the material for the activity, then choose the finish. Silicone and fluoroelastomer suit sweat-heavy wear, showers, and gym sessions because they clean easily. Woven nylon and Perlon feel breathable in warm weather and during travel, but they absorb water, so let them dry before wearing them again.
Stainless steel bracelets and Milanese loops work well for office and formal settings. They can pick up scratches against hard surfaces, while leather should stay away from workouts and heavy moisture. Resin links and rugged two-piece straps make more sense outdoors, where a metal buckle can snag.
| Material | Best for | Avoid for | Care note |
|---|---|---|---|
| Silicone or fluoroelastomer | Workouts, sweat, showers | Formal outfits when you want a dressier finish | Rinse and dry after heavy wear |
| Nylon or Perlon | Travel, warm weather, everyday comfort | Swimming or prolonged damp wear | Air-dry after cleaning |
| Stainless steel or Milanese | Office wear and formal clothing | Rough surfaces and contact that may scratch | Wipe away moisture and grit |
| Leather | Dry office and evening wear | Workouts, showers, and wet conditions | Store separately from damp bands |
| Resin or rugged two-piece | Outdoor use and practical daily wear | Formal settings where metal or leather is expected | Clean grit from the connector |
Before ordering, confirm the lug width in millimetres (or the case size for Apple Watch), the exact fitting system, and the watch model's connector design. Compatibility always has to be checked against the watch case, whatever the material or style.
Then go straight to the collection for your own fitting: Apple Watch bands by case size, Garmin watch bands for QuickFit and other Garmin fittings, or Samsung Galaxy Watch bands. Choose a band that matches both your fitting and how you wear the watch.
Ähnliche Beiträge

- October 06, 2026
Clear installation instructions for smartwatch bands. Learn how to attach, verify, and troubleshoot Apple, Samsung, Garmin, and Fitbit straps safely.

- October 02, 2026
Everything to know about the Coros Pace 4 nylon band including sizing, quick-release installation, cleaning tips, and compatible third-party options.

