30-day comfort guarantee · Easy exchanges
In stock · Ready to ship
Build your rotation · 2nd strap −50%
-
Apple Bands -
Fitbit Bands -
Samsung Bands -
Garmin Bands Forerunner® Bands- Forerunner® 970
- Forerunner® 965
- Forerunner® 955
- Forerunner® 945 LTE
- Forerunner® 945
- Forerunner® 935
- Forerunner® 745
- Forerunner® 645
- Forerunner® 570 - 47mm
- Forerunner® 570 - 42mm
- Forerunner® 55
- Forerunner® 265
- Forerunner® 255 Music
- Forerunner® 245 Music
- Forerunner® 245
- Forerunner® 165 Music
- Forerunner® 165
Fēnix® Bands- fēnix® 8 — 51mm
- fēnix® 8 — 47mm
- fēnix® 8 – 51 mm, AMOLED
- fēnix® 8 – 51 mm
- fēnix® 8 – 47 mm, Solar
- fēnix® 8 – 47 mm, AMOLED
- fēnix® 8 Pro – 47 mm, AMOLED
- fēnix® 7X Pro – Solar Edition
- fēnix® 7X Pro – Sapphire Solar Edition
- fēnix® 7X (51 mm)
- fēnix® 7 Pro – Sapphire Solar Edition
- fēnix® 7 (47 mm)
- fēnix® 6X - Sapphire Editions
- fēnix® 6X - Pro
- fēnix® 6 – Standard Edition
- fēnix® 6 - Sapphire Editions
- fēnix® 6 - Pro Solar Edition
- fēnix® 6 - Pro
- fēnix® 5X Plus
- fēnix® 5X
- fēnix® 5
- fēnix® 3 Sapphire
- fēnix® 3 HR
- fēnix® 3
Instinct® Bands- Instinct® 3 – 50 mm, Solar
- Instinct® 3 – 50 mm, AMOLED
- Instinct® 3 – 45 mm, Solar, Tactical Edition
- Instinct® 3 – 45 mm, Solar
- Instinct® 3 – 45 mm, AMOLED
- Instinct® 2X Solar
- Instinct® 2 Solar - Tactical Edition
- Instinct® 2 Solar
- Instinct® Crossover - Standard Edition
- Instinct® Crossover AMOLED
- Instinct® Crossover AMOLED - Tactical Edition
- Instinct® Crossover Solar
- Instinct® Crossover Solar - Tactical Edition
- Instinct® E – 45 mm
- Instinct® Solar – Standard Edition
- Instinct® Solar – Tactical Edition
- Instinct® – Standard Edition
- Instinct® – Tactical Edition
MARQ® Bands- MARQ® Adventurer
- MARQ® Adventurer (Gen 2)
- MARQ® Adventurer (Gen 2) - Damascus Steel Edition
- MARQ® Adventurer Performance Edition
- MARQ® Athlete
- MARQ® Athlete (Gen 2)
- MARQ® Athlete (Gen 2) - Carbon Edition
- MARQ® Athlete Performance Edition
- MARQ® Aviator
- MARQ® Aviator (Gen 2)
- MARQ® Aviator Performance Edition
- MARQ® Captain
- MARQ® Captain (Gen 2)
- MARQ® Captain: American Magic Edition
- MARQ® Commander
- MARQ® Commander (Gen 2) - Carbon Edition
- MARQ® Driver
- MARQ® Driver Performance Edition
- MARQ® Golfer
- MARQ® Golfer (Gen 2)
- MARQ® Golfer (Gen 2) - Carbon Edition
Tactix® Bands- tactix® 8 – 51 mm Solar, Elite
- tactix® 8 – 51 mm Solar
- tactix® 8 – 51 mm AMOLED
- tactix® 8 – 47 mm, AMOLED
- tactix® 7 – Standard Edition
- tactix® 7 – Pro Edition
- tactix® 7 – Pro Ballistics Edition
- tactix® 7 – AMOLED Edition
- tactix® 7
- tactix® Bravo
- tactix® Charlie
- tactix® Delta - Sapphire Edition
- tactix® Delta - Solar Edition
- tactix® Delta - Solar Edition with Ballistics
-
Help
Log in
Reset password
Create an account
Your bag(0)
Your cart is empty
Continue ShoppingSearch
-
Apple Bands
- Apple Watch Series
- Apple Watch Ultra
- Apple Watch SE
-
- Fitbit Bands
-
Samsung Bands
- Galaxy Watch 8 / 8 Classic
- Galaxy Watch Ultra
- Galaxy Watch 7 / 7 Pro
- Galaxy Watch 6 / 6 Classic
- Galaxy Watch 5 / 5 Pro
- Galaxy Watch 4 / 4 Classic
- Galaxy Watch 3 Bands
- Galaxy Watch (2018) Bands
- Galaxy Watch Active Bands
- Gear Watch Bands
-
-
Garmin Bands
- Approach® Bands
- D2™ Bands
- Descent™ Bands
- Enduro™ Bands
- Epix™ Bands
-
Forerunner® Bands
- Forerunner® 970
- Forerunner® 965
- Forerunner® 955
- Forerunner® 945 LTE
- Forerunner® 945
- Forerunner® 935
- Forerunner® 745
- Forerunner® 645
- Forerunner® 570 - 47mm
- Forerunner® 570 - 42mm
- Forerunner® 55
- Forerunner® 265
- Forerunner® 255 Music
- Forerunner® 245 Music
- Forerunner® 245
- Forerunner® 165 Music
- Forerunner® 165
- Foretrex® Bands
-
Fēnix® Bands
- fēnix® 8 — 51mm
- fēnix® 8 — 47mm
- fēnix® 8 – 51 mm, AMOLED
- fēnix® 8 – 51 mm
- fēnix® 8 – 47 mm, Solar
- fēnix® 8 – 47 mm, AMOLED
- fēnix® 8 Pro – 47 mm, AMOLED
- fēnix® 7X Pro – Solar Edition
- fēnix® 7X Pro – Sapphire Solar Edition
- fēnix® 7X (51 mm)
- fēnix® 7 Pro – Sapphire Solar Edition
- fēnix® 7 (47 mm)
- fēnix® 6X - Sapphire Editions
- fēnix® 6X - Pro
- fēnix® 6 – Standard Edition
- fēnix® 6 - Sapphire Editions
- fēnix® 6 - Pro Solar Edition
- fēnix® 6 - Pro
- fēnix® 5X Plus
- fēnix® 5X
- fēnix® 5
- fēnix® 3 Sapphire
- fēnix® 3 HR
- fēnix® 3
-
Instinct® Bands
- Instinct® 3 – 50 mm, Solar
- Instinct® 3 – 50 mm, AMOLED
- Instinct® 3 – 45 mm, Solar, Tactical Edition
- Instinct® 3 – 45 mm, Solar
- Instinct® 3 – 45 mm, AMOLED
- Instinct® 2X Solar
- Instinct® 2 Solar - Tactical Edition
- Instinct® 2 Solar
- Instinct® Crossover - Standard Edition
- Instinct® Crossover AMOLED
- Instinct® Crossover AMOLED - Tactical Edition
- Instinct® Crossover Solar
- Instinct® Crossover Solar - Tactical Edition
- Instinct® E – 45 mm
- Instinct® Solar – Standard Edition
- Instinct® Solar – Tactical Edition
- Instinct® – Standard Edition
- Instinct® – Tactical Edition
-
MARQ® Bands
- MARQ® Adventurer
- MARQ® Adventurer (Gen 2)
- MARQ® Adventurer (Gen 2) - Damascus Steel Edition
- MARQ® Adventurer Performance Edition
- MARQ® Athlete
- MARQ® Athlete (Gen 2)
- MARQ® Athlete (Gen 2) - Carbon Edition
- MARQ® Athlete Performance Edition
- MARQ® Aviator
- MARQ® Aviator (Gen 2)
- MARQ® Aviator Performance Edition
- MARQ® Captain
- MARQ® Captain (Gen 2)
- MARQ® Captain: American Magic Edition
- MARQ® Commander
- MARQ® Commander (Gen 2) - Carbon Edition
- MARQ® Driver
- MARQ® Driver Performance Edition
- MARQ® Golfer
- MARQ® Golfer (Gen 2)
- MARQ® Golfer (Gen 2) - Carbon Edition
- Quatix® Bands
-
Tactix® Bands
- tactix® 8 – 51 mm Solar, Elite
- tactix® 8 – 51 mm Solar
- tactix® 8 – 51 mm AMOLED
- tactix® 8 – 47 mm, AMOLED
- tactix® 7 – Standard Edition
- tactix® 7 – Pro Edition
- tactix® 7 – Pro Ballistics Edition
- tactix® 7 – AMOLED Edition
- tactix® 7
- tactix® Bravo
- tactix® Charlie
- tactix® Delta - Sapphire Edition
- tactix® Delta - Solar Edition
- tactix® Delta - Solar Edition with Ballistics
- Venu® Bands
- Vívoactive® Bands
- Vívomove® Bands
- Other Garmin Bands
-
- Help
€
EUR / EN

How to replace apple watch band: A Fast, Easy Guide to a Secure Fit
- February 04, 2026
- |
- Eugene
Ready for a fresh look? Changing your Apple Watch band is one of the quickest ways to completely transform its style, and luckily, it's a remarkably simple process.
Your Quick Guide to Changing an Apple Watch Band
Swapping your Apple Watch band is easily the best way to personalise your tech. In just a few seconds, you can go from a gym-ready silicone strap to a professional stainless steel one for a meeting. The whole process is designed to be effortless.
When Apple introduced its quick-release system back in 2015, it was a genuine game-changer. What used to be a fiddly job with traditional watch spring bars became a task you could do in under 10 seconds.
First, Check Your Watch and Band Size
Before you get started, the most crucial step is making sure your new band is compatible with your watch. It's a common mistake to grab a band that doesn't match your watch's case size, so let's get that sorted first.
- For smaller watches: Bands made for the 38mm, 40mm, and 41mm cases are all interchangeable.
- For larger watches: Bands designed for the 42mm, 44mm, 45mm, and 49mm cases are all cross-compatible.
This clever system means you can keep using your favourite bands even when you upgrade your Apple Watch, which is a fantastic touch.
To make things even clearer, here's a quick compatibility table.
Apple Watch Size and Band Compatibility Guide
| Apple Watch Case Size | Compatible Band Size |
|---|---|
| 38mm, 40mm, 41mm | 38mm / 40mm / 41mm |
| 42mm, 44mm, 45mm, 49mm | 42mm / 44mm / 45mm / 49mm |
Having this compatibility makes building a collection of straps so much easier. If you want to dive deeper and ensure you get the perfect fit every time, check out our detailed guide on finding the right straps for your Apple Watch.
Getting Your Old Apple Watch Band Off Safely
Right, before you can clip on that sharp new strap, you need to get the old one off. It's one of those things that seems a bit fiddly the first time, and plenty of people are wary of scratching their watch or breaking something. But honestly, once you know the trick, it's a piece of cake. A little prep goes a long way in avoiding any mishaps.
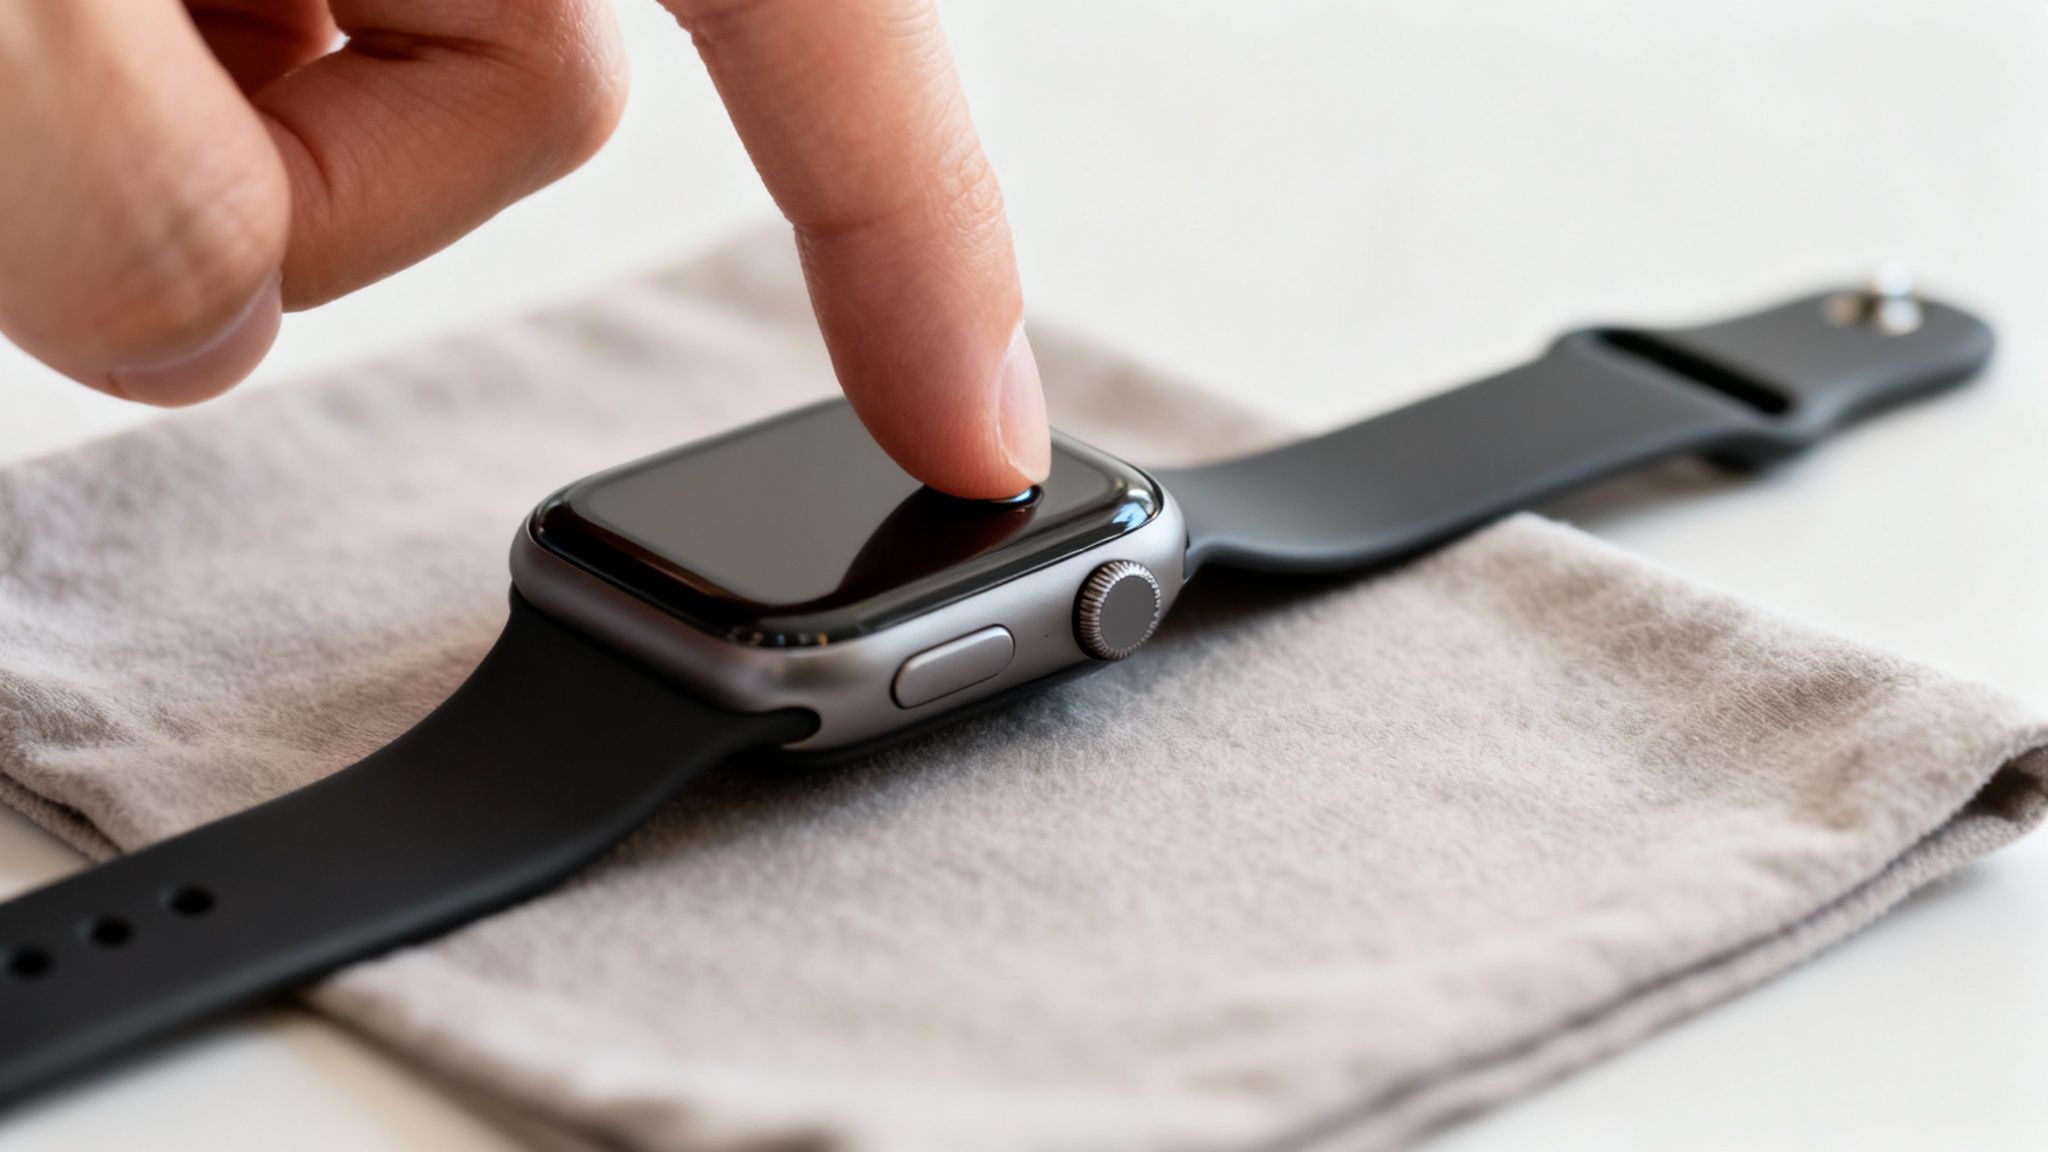
First things first, find a soft, clean spot to work. A microfibre cloth or even a soft tea towel laid on a table is ideal. Just pop your Apple Watch face-down on it. This not only keeps the screen safe from scuffs but also stops the watch from skating around while you’re trying to work.
The Magic Release Buttons
Flip the watch over so you’re looking at the back. See those two little pill-shaped buttons, one at the top and one at the bottom where the strap meets the case? Those are the band release buttons. They're the secret to getting the band off without a fight.
The biggest mistake I see people make is trying to yank the band out without holding the button down properly. You can really strain the locking mechanism that way, so a bit of patience now saves a potential headache later.
Okay, let's do it. Pick one side to start with. Press and hold the release button down firmly – your fingernail is perfect for this. While you’ve got it held in, just slide the band sideways, straight out of its slot. It should glide out smoothly. If you feel any real resistance, stop. Let go of the button, press it again to make sure it's fully engaged, and then try sliding again.
Now just do the exact same thing on the other side. And that’s it, you’re free!
This is the perfect opportunity to think about why you're changing bands. For many, it's not just about looks. A recent survey from the Office for National Statistics found that a surprising 41% of UK Apple Watch users had issues with skin irritation from the original bands. That's a big reason why so many people are now exploring different materials from other makers. It's worth a moment to learn more about materials and potential skin sensitivities so you can find something that feels great all day long.
Getting to Grips with Different Apple Watch Band Styles
Once you’ve got the hang of the basic slide-and-click method, you'll find that changing most Apple Watch bands is dead simple. Your standard Silicone Sport Band or even the comfy Nylon Sport Loop work on this exact principle. You just guide the new band into the channel on the watch case until you feel and hear that reassuring little click. That’s it – locked in and ready to go.
It’s this simplicity that’s turned so many people into collectors. It's a far cry from the old days of fiddly spring bars. Back before 2015, only about 8% of smartwatch users ever bothered to change their straps. Fast forward to 2020, and a huge 75% of UK Apple Watch owners were swapping theirs at least quarterly to suit their outfit or activity.
The basic removal process is the same for nearly every band. You press the button and slide it out.
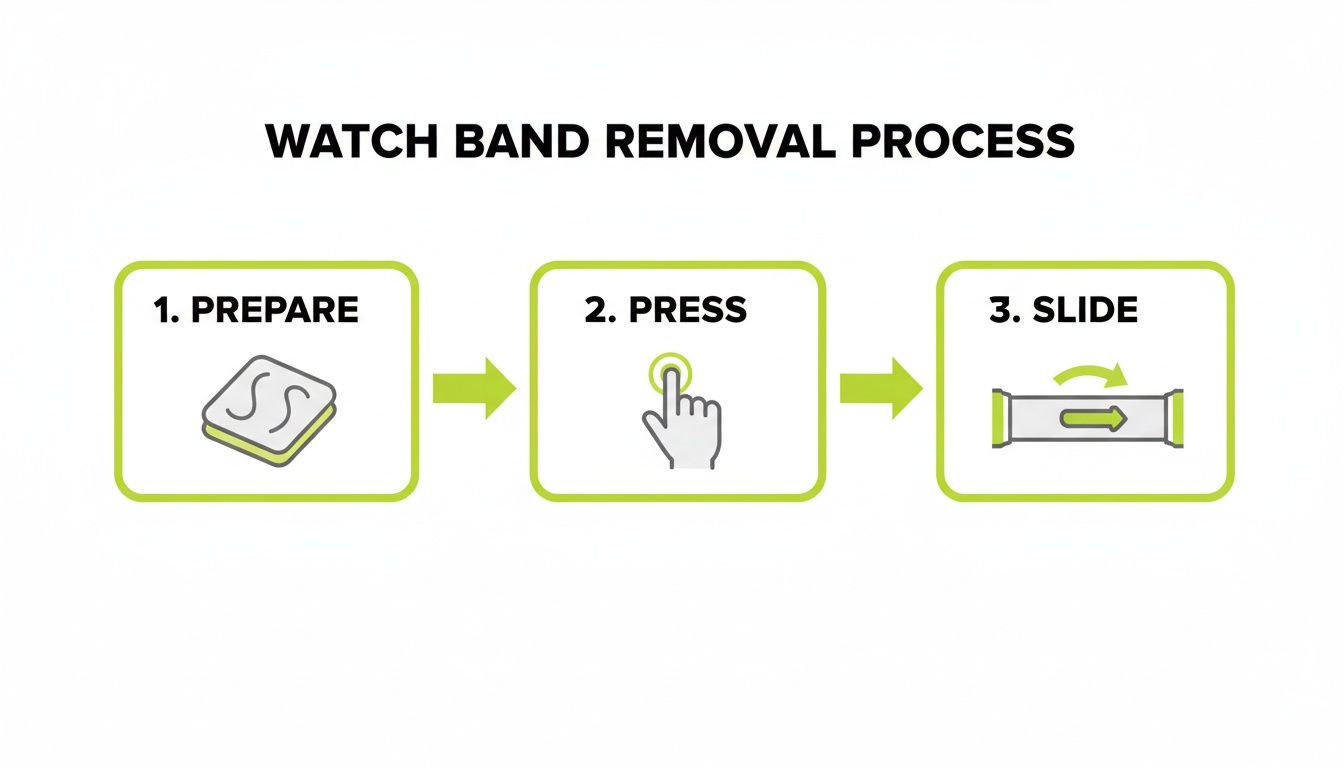
As you can see, it boils down to getting yourself set, pressing the release button, and smoothly sliding the old band out of its channel.
Handling Trickier Band Types
While the core mechanism doesn't change, some of the more premium bands need a bit of extra care. The Milanese Loop and the classic Stainless Steel Link Bracelet, for instance, have their own little quirks you need to know about.
The Milanese Loop Magnet Trick
The Milanese Loop is completely magnetic, which looks great but can make installation a bit fiddly. As you're trying to slide the connector in, the magnetic clasp has a tendency to snap onto the watch case, preventing it from going in straight.
Here’s a little tip from experience: use one finger to hold the magnetic clasp away from the watch body while you guide the connector into the slot. This stops it from catching unexpectedly and keeps the process smooth and scratch-free.
Sizing a Stainless Steel Link Bracelet
With a Stainless Steel Link Bracelet, the most important work happens before you attach it. Getting the right fit means removing links, which almost always calls for a small and cheap link removal tool. Don't skip this step.
- Why bother? If it’s not sized right, a link bracelet is either painfully tight or so loose that the watch’s sensors won't work properly. You'll miss notifications and get inaccurate heart rate readings.
- How to do it: The tool lets you push out the tiny pins that hold the links together. The key is to remove an equal number of links from both sides of the clasp. This keeps the watch face nicely centred on your wrist.
After you've adjusted it for the perfect fit, it slides into the watch case just like any other band. Taking five minutes to get the sizing right makes a world of difference. If you're looking to expand your collection, you can explore a variety of watch band styles and accessories to find your next favourite.
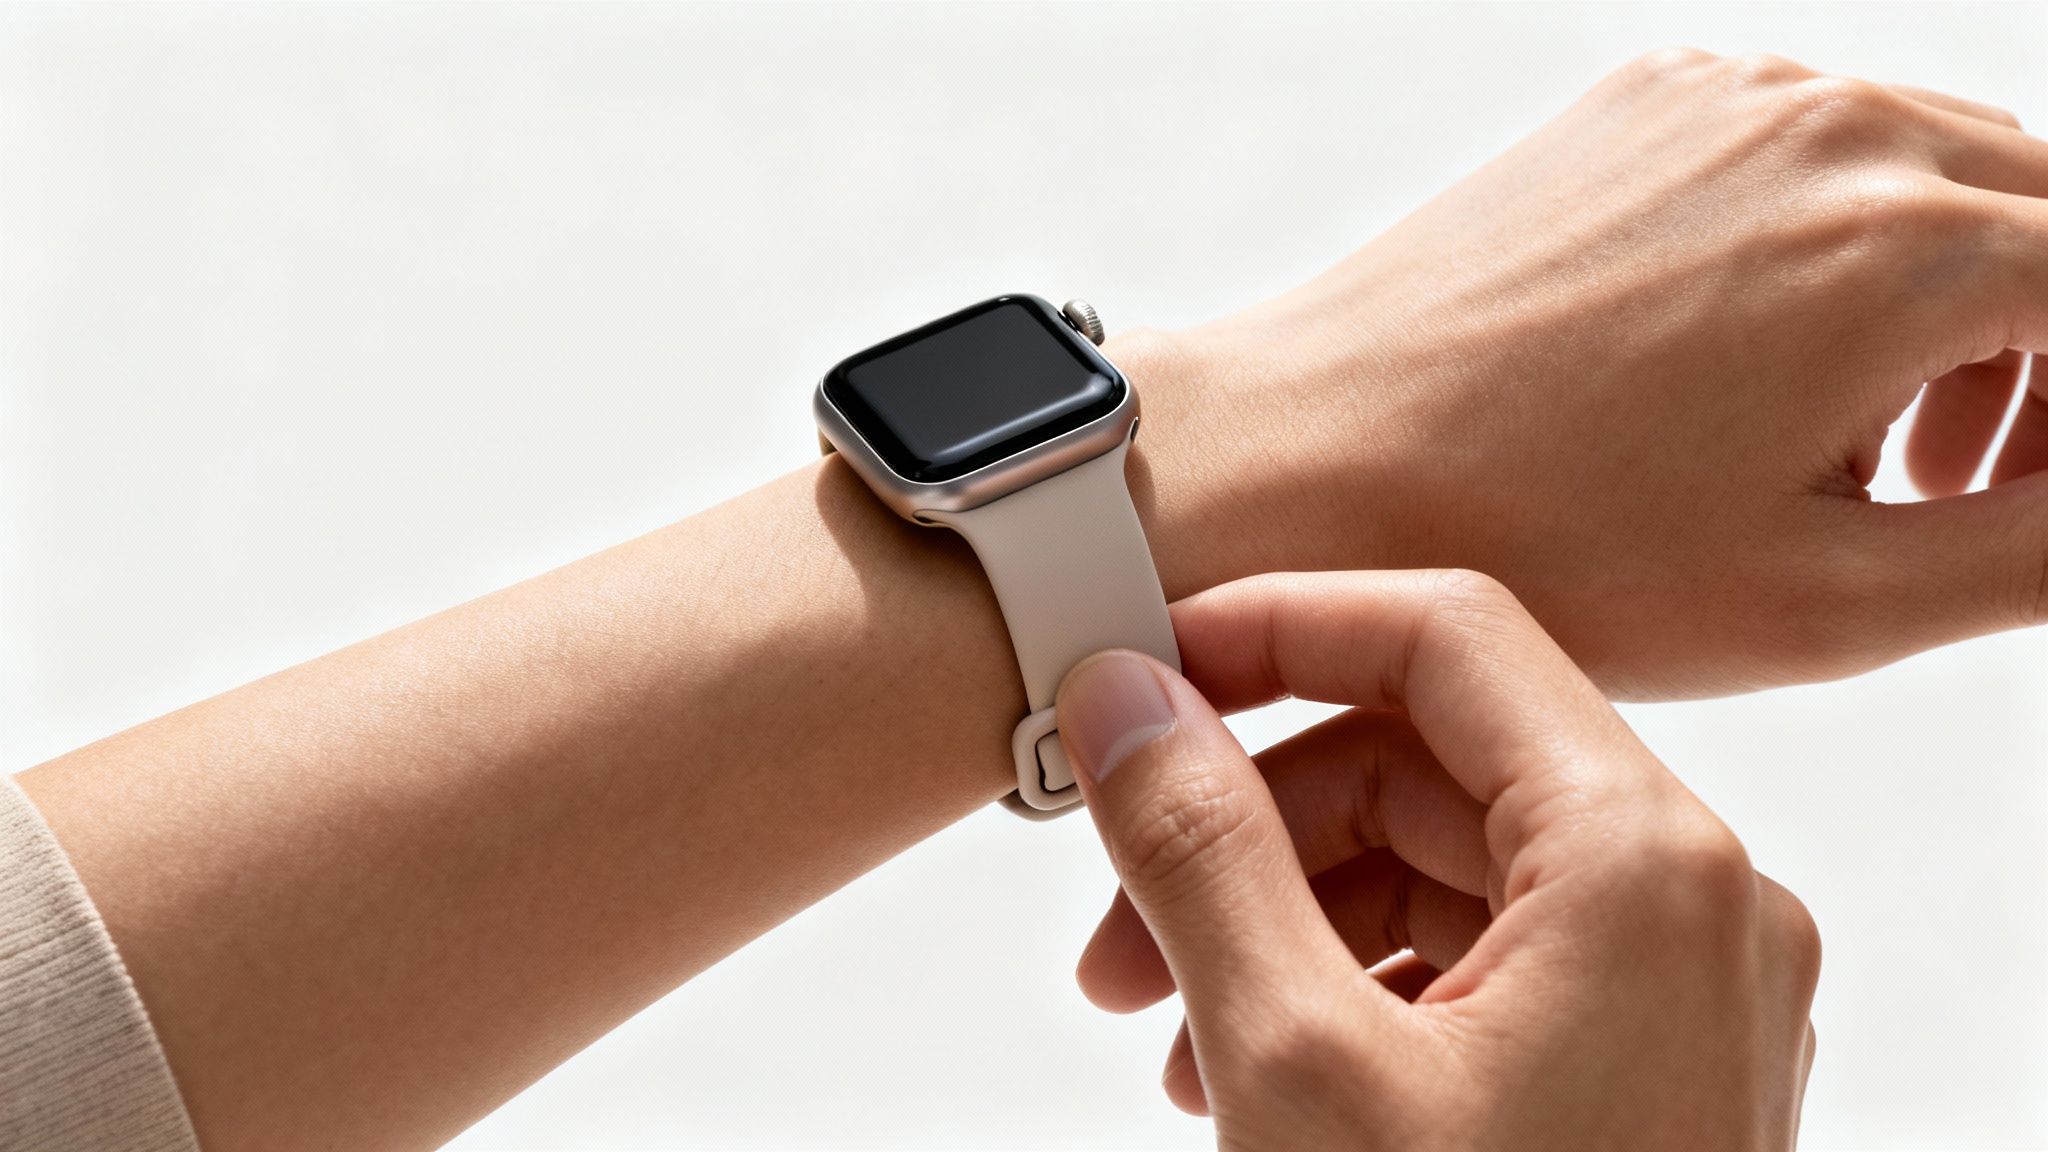
Getting the Perfect Fit and Fixing Common Problems
Attaching your new band is just the start—getting the fit right is the real key to comfort and making sure your watch works as it should. A poorly fitted strap isn't just a minor annoyance; it can seriously throw off your Apple Watch's health sensors.
If your band is too loose, it'll slide about, leading to dodgy heart rate readings. Too tight, and it's not only uncomfortable but can also affect your circulation. The sweet spot is just above your wrist bone. It should feel secure, but you should still be able to slip a finger underneath without a struggle.
This isn't just about feel; it's about function. Figures from Apple Support indicate that sensor problems, often down to a bad fit, affect roughly 12% of UK users. A proper fit from the get-go helps you avoid contributing to the 22% return rate that many online retailers see for ill-fitting accessories.
Troubleshooting Common Band Replacement Issues
We've all been there—you're excited to try on a new band, but it just refuses to click into place. Or worse, it gets stuck. Before you use any force, take a breath. It's almost always a simple fix.
Here's a quick guide to the most common snags you might hit when swapping bands.
| Problem | Potential Cause | Solution |
|---|---|---|
| Band won't slide in or lock | Debris or misalignment | Give the watch's channel and the band's connector a quick wipe with a clean, dry microfibre cloth to clear any dust or fluff. Also, double-check it's not upside down. |
| Band feels stuck or jammed | Incorrect angle or forcing it | Don't yank it! Press the release button firmly and wiggle the band gently from side to side as you slide it out. Avoid applying pressure at an angle. |
| Band clicks but feels loose | Wrong band size for watch case | Ensure the band's connector width (38/40/41mm or 42/44/45/49mm) matches your Apple Watch case size. They aren't cross-compatible. |
| Link bracelet is too tight/loose | Needs resizing | Most metal link bracelets require you to add or remove links for a custom fit. It's a bit fiddly but makes a world of difference. |
Most of the time, the issue is simply trying to install the band upside down. The connector has a side with a tiny silver centrepiece or text printed on it—that side should always face your wrist. If it’s facing up towards the ceiling, it’s not going to lock.
If the channel is clean and you're sure it's the right way up but it's still being stubborn, try gently wiggling it from side to side as you push. With some of the more complex bands, like stainless steel link bracelets, you often need to resize them before they'll sit properly. If you're struggling with that, our guide on how to remove watch band links has a complete walkthrough to get that perfect, customised fit.
How to Care for Your New Apple Watch Band
So, you've mastered swapping out your Apple Watch bands. Brilliant. Now, let's talk about keeping that new strap looking as good as the day you got it. A little regular care goes a long way, preventing grime and extending the life of your band, no matter what it's made of.
For those everyday silicone or nylon bands, a quick clean after a workout is a must. All it takes is a bit of mild hand soap and warm water to wash away the sweat and oils that can eventually lead to odours or discolouration.
Material-Specific Cleaning Tips
Of course, different materials need different care. You wouldn't treat a leather jacket like a gym t-shirt, and the same principle applies to your watch bands.
- Stainless Steel & Milanese Loop: To keep these looking sharp and shiny, a simple wipe with a soft, lint-free cloth is all it takes. This gets rid of fingerprints and smudges without any risk of scratching the finish.
- Silicone & Nylon: These bands are made for an active life. Opting for sweat-proof versions can cut failure rates by 40%, and they clean up in just 30 seconds under a tap. On the other hand, a Milanese loop might need more frequent washing to prevent an 18% odour buildup. If you want to dive deeper, you can explore Apple’s guidance on materials and cleaning.
Crucial Tip: Always, and I mean always, make sure your band is completely dry before you snap it back onto your watch. Trapped moisture isn't just bad for the band's material; it can also lead to skin irritation.
These simple habits will make a massive difference. For a more detailed breakdown, check out our guide on how to clean your Apple Watch band.
Got Questions? We’ve Got Answers
Swapping your Apple Watch band is usually a piece of cake, but sometimes a small snag can throw a spanner in the works. Let's tackle some of the most common questions that pop up.
Do All Apple Watch Bands Fit All Models?
Not exactly, but Apple has kept things surprisingly straightforward over the years. The key isn't the Series number (like a Series 3 vs a Series 9), but the actual physical case size of your watch.
Compatibility is broken down into two main families:
- Bands designed for 38mm, 40mm, and 41mm cases are all interchangeable with each other.
- Likewise, bands for the larger 42mm, 44mm, 45mm, and 49mm cases are all cross-compatible.
So, if you decide to upgrade from a 40mm Series 6 to a newer 41mm Series 8, you're in luck! All your old bands will fit perfectly. Just make sure you're buying a new band that belongs to the right size group for your watch.
My New Band Feels Stiff and Won't Slide In
Whatever you do, don't force it. Shoving a band into the slot can seriously damage the connector on the band or, even worse, the locking mechanism inside the watch itself.
First, double-check the orientation. The side of the connector that has tiny text or a small silver bit in the middle should always be facing your wrist. If it's the right way up, try giving it a gentle side-to-side wiggle as you slide it in. New bands, especially third-party ones, can sometimes have slightly tighter tolerances. A quick peek to ensure the channel is clear of any dust or gunk is also a good idea.
A classic rookie error is holding the watch in a way that your fingers accidentally press the release button while you're sliding the new band in. This stops the lock from catching, so keep your fingers clear of that button.
How Do I Know Which Size Band to Get for My Wrist?
Getting the right fit is everything – it affects comfort and even the accuracy of the heart rate sensor. The best way to get it right is to grab a flexible measuring tape and measure the circumference of your wrist.
When you're shopping, you'll see that most product pages list the wrist sizes a band will fit (e.g., "fits 140–190mm wrists"). This completely removes the guesswork. For styles like link bracelets, you’ll get that perfect custom fit by adding or removing links until the watch feels snug, but not tight.
Ready to find a new style? Nothing But Bands has a massive collection of high-quality, comfortable, and stylish bands for every Apple Watch. Explore our full range and discover the perfect strap for any occasion at https://nothingbutbands.com.