30-day comfort guarantee · Easy exchanges
In stock · Ready to ship
Build your rotation · 2nd strap −50%
-
Apple Bands -
Fitbit Bands -
Samsung Bands -
Garmin Bands Forerunner® Bands- Forerunner® 970
- Forerunner® 965
- Forerunner® 955
- Forerunner® 945 LTE
- Forerunner® 945
- Forerunner® 935
- Forerunner® 745
- Forerunner® 645
- Forerunner® 570 - 47mm
- Forerunner® 570 - 42mm
- Forerunner® 55
- Forerunner® 265
- Forerunner® 255 Music
- Forerunner® 245 Music
- Forerunner® 245
- Forerunner® 165 Music
- Forerunner® 165
Fēnix® Bands- fēnix® 8 — 51mm
- fēnix® 8 — 47mm
- fēnix® 8 – 51 mm, AMOLED
- fēnix® 8 – 51 mm
- fēnix® 8 – 47 mm, Solar
- fēnix® 8 – 47 mm, AMOLED
- fēnix® 8 Pro – 47 mm, AMOLED
- fēnix® 7X Pro – Solar Edition
- fēnix® 7X Pro – Sapphire Solar Edition
- fēnix® 7X (51 mm)
- fēnix® 7 Pro – Sapphire Solar Edition
- fēnix® 7 (47 mm)
- fēnix® 6X - Sapphire Editions
- fēnix® 6X - Pro
- fēnix® 6 – Standard Edition
- fēnix® 6 - Sapphire Editions
- fēnix® 6 - Pro Solar Edition
- fēnix® 6 - Pro
- fēnix® 5X Plus
- fēnix® 5X
- fēnix® 5
- fēnix® 3 Sapphire
- fēnix® 3 HR
- fēnix® 3
Instinct® Bands- Instinct® 3 – 50 mm, Solar
- Instinct® 3 – 50 mm, AMOLED
- Instinct® 3 – 45 mm, Solar, Tactical Edition
- Instinct® 3 – 45 mm, Solar
- Instinct® 3 – 45 mm, AMOLED
- Instinct® 2X Solar
- Instinct® 2 Solar - Tactical Edition
- Instinct® 2 Solar
- Instinct® Crossover - Standard Edition
- Instinct® Crossover AMOLED
- Instinct® Crossover AMOLED - Tactical Edition
- Instinct® Crossover Solar
- Instinct® Crossover Solar - Tactical Edition
- Instinct® E – 45 mm
- Instinct® Solar – Standard Edition
- Instinct® Solar – Tactical Edition
- Instinct® – Standard Edition
- Instinct® – Tactical Edition
MARQ® Bands- MARQ® Adventurer
- MARQ® Adventurer (Gen 2)
- MARQ® Adventurer (Gen 2) - Damascus Steel Edition
- MARQ® Adventurer Performance Edition
- MARQ® Athlete
- MARQ® Athlete (Gen 2)
- MARQ® Athlete (Gen 2) - Carbon Edition
- MARQ® Athlete Performance Edition
- MARQ® Aviator
- MARQ® Aviator (Gen 2)
- MARQ® Aviator Performance Edition
- MARQ® Captain
- MARQ® Captain (Gen 2)
- MARQ® Captain: American Magic Edition
- MARQ® Commander
- MARQ® Commander (Gen 2) - Carbon Edition
- MARQ® Driver
- MARQ® Driver Performance Edition
- MARQ® Golfer
- MARQ® Golfer (Gen 2)
- MARQ® Golfer (Gen 2) - Carbon Edition
Tactix® Bands- tactix® 8 – 51 mm Solar, Elite
- tactix® 8 – 51 mm Solar
- tactix® 8 – 51 mm AMOLED
- tactix® 8 – 47 mm, AMOLED
- tactix® 7 – Standard Edition
- tactix® 7 – Pro Edition
- tactix® 7 – Pro Ballistics Edition
- tactix® 7 – AMOLED Edition
- tactix® 7
- tactix® Bravo
- tactix® Charlie
- tactix® Delta - Sapphire Edition
- tactix® Delta - Solar Edition
- tactix® Delta - Solar Edition with Ballistics
-
Help
Log in
Reset password
Create an account
Your bag(0)
Your cart is empty
Continue ShoppingSearch
-
Apple Bands
- Apple Watch Series
- Apple Watch Ultra
- Apple Watch SE
-
- Fitbit Bands
-
Samsung Bands
- Galaxy Watch 8 / 8 Classic
- Galaxy Watch Ultra
- Galaxy Watch 7 / 7 Pro
- Galaxy Watch 6 / 6 Classic
- Galaxy Watch 5 / 5 Pro
- Galaxy Watch 4 / 4 Classic
- Galaxy Watch 3 Bands
- Galaxy Watch (2018) Bands
- Galaxy Watch Active Bands
- Gear Watch Bands
-
-
Garmin Bands
- Approach® Bands
- D2™ Bands
- Descent™ Bands
- Enduro™ Bands
- Epix™ Bands
-
Forerunner® Bands
- Forerunner® 970
- Forerunner® 965
- Forerunner® 955
- Forerunner® 945 LTE
- Forerunner® 945
- Forerunner® 935
- Forerunner® 745
- Forerunner® 645
- Forerunner® 570 - 47mm
- Forerunner® 570 - 42mm
- Forerunner® 55
- Forerunner® 265
- Forerunner® 255 Music
- Forerunner® 245 Music
- Forerunner® 245
- Forerunner® 165 Music
- Forerunner® 165
- Foretrex® Bands
-
Fēnix® Bands
- fēnix® 8 — 51mm
- fēnix® 8 — 47mm
- fēnix® 8 – 51 mm, AMOLED
- fēnix® 8 – 51 mm
- fēnix® 8 – 47 mm, Solar
- fēnix® 8 – 47 mm, AMOLED
- fēnix® 8 Pro – 47 mm, AMOLED
- fēnix® 7X Pro – Solar Edition
- fēnix® 7X Pro – Sapphire Solar Edition
- fēnix® 7X (51 mm)
- fēnix® 7 Pro – Sapphire Solar Edition
- fēnix® 7 (47 mm)
- fēnix® 6X - Sapphire Editions
- fēnix® 6X - Pro
- fēnix® 6 – Standard Edition
- fēnix® 6 - Sapphire Editions
- fēnix® 6 - Pro Solar Edition
- fēnix® 6 - Pro
- fēnix® 5X Plus
- fēnix® 5X
- fēnix® 5
- fēnix® 3 Sapphire
- fēnix® 3 HR
- fēnix® 3
-
Instinct® Bands
- Instinct® 3 – 50 mm, Solar
- Instinct® 3 – 50 mm, AMOLED
- Instinct® 3 – 45 mm, Solar, Tactical Edition
- Instinct® 3 – 45 mm, Solar
- Instinct® 3 – 45 mm, AMOLED
- Instinct® 2X Solar
- Instinct® 2 Solar - Tactical Edition
- Instinct® 2 Solar
- Instinct® Crossover - Standard Edition
- Instinct® Crossover AMOLED
- Instinct® Crossover AMOLED - Tactical Edition
- Instinct® Crossover Solar
- Instinct® Crossover Solar - Tactical Edition
- Instinct® E – 45 mm
- Instinct® Solar – Standard Edition
- Instinct® Solar – Tactical Edition
- Instinct® – Standard Edition
- Instinct® – Tactical Edition
-
MARQ® Bands
- MARQ® Adventurer
- MARQ® Adventurer (Gen 2)
- MARQ® Adventurer (Gen 2) - Damascus Steel Edition
- MARQ® Adventurer Performance Edition
- MARQ® Athlete
- MARQ® Athlete (Gen 2)
- MARQ® Athlete (Gen 2) - Carbon Edition
- MARQ® Athlete Performance Edition
- MARQ® Aviator
- MARQ® Aviator (Gen 2)
- MARQ® Aviator Performance Edition
- MARQ® Captain
- MARQ® Captain (Gen 2)
- MARQ® Captain: American Magic Edition
- MARQ® Commander
- MARQ® Commander (Gen 2) - Carbon Edition
- MARQ® Driver
- MARQ® Driver Performance Edition
- MARQ® Golfer
- MARQ® Golfer (Gen 2)
- MARQ® Golfer (Gen 2) - Carbon Edition
- Quatix® Bands
-
Tactix® Bands
- tactix® 8 – 51 mm Solar, Elite
- tactix® 8 – 51 mm Solar
- tactix® 8 – 51 mm AMOLED
- tactix® 8 – 47 mm, AMOLED
- tactix® 7 – Standard Edition
- tactix® 7 – Pro Edition
- tactix® 7 – Pro Ballistics Edition
- tactix® 7 – AMOLED Edition
- tactix® 7
- tactix® Bravo
- tactix® Charlie
- tactix® Delta - Sapphire Edition
- tactix® Delta - Solar Edition
- tactix® Delta - Solar Edition with Ballistics
- Venu® Bands
- Vívoactive® Bands
- Vívomove® Bands
- Other Garmin Bands
-
- Help
$
CAD / EN

How to Remove Watch Band Links for the Perfect Fit
- January 09, 2026
- |
- Eugene
There’s nothing quite like the feeling of a new metal watch band, but the real satisfaction comes when it fits your wrist just right. If it’s too loose, it’ll slide around and could even interfere with your smartwatch's sensors. Too tight, and it's just plain uncomfortable.
This guide will walk you through exactly how to remove watch band links yourself, saving you a trip to the jeweller and giving you that perfect, custom fit in minutes.
Why a Perfect Watch Band Fit Matters
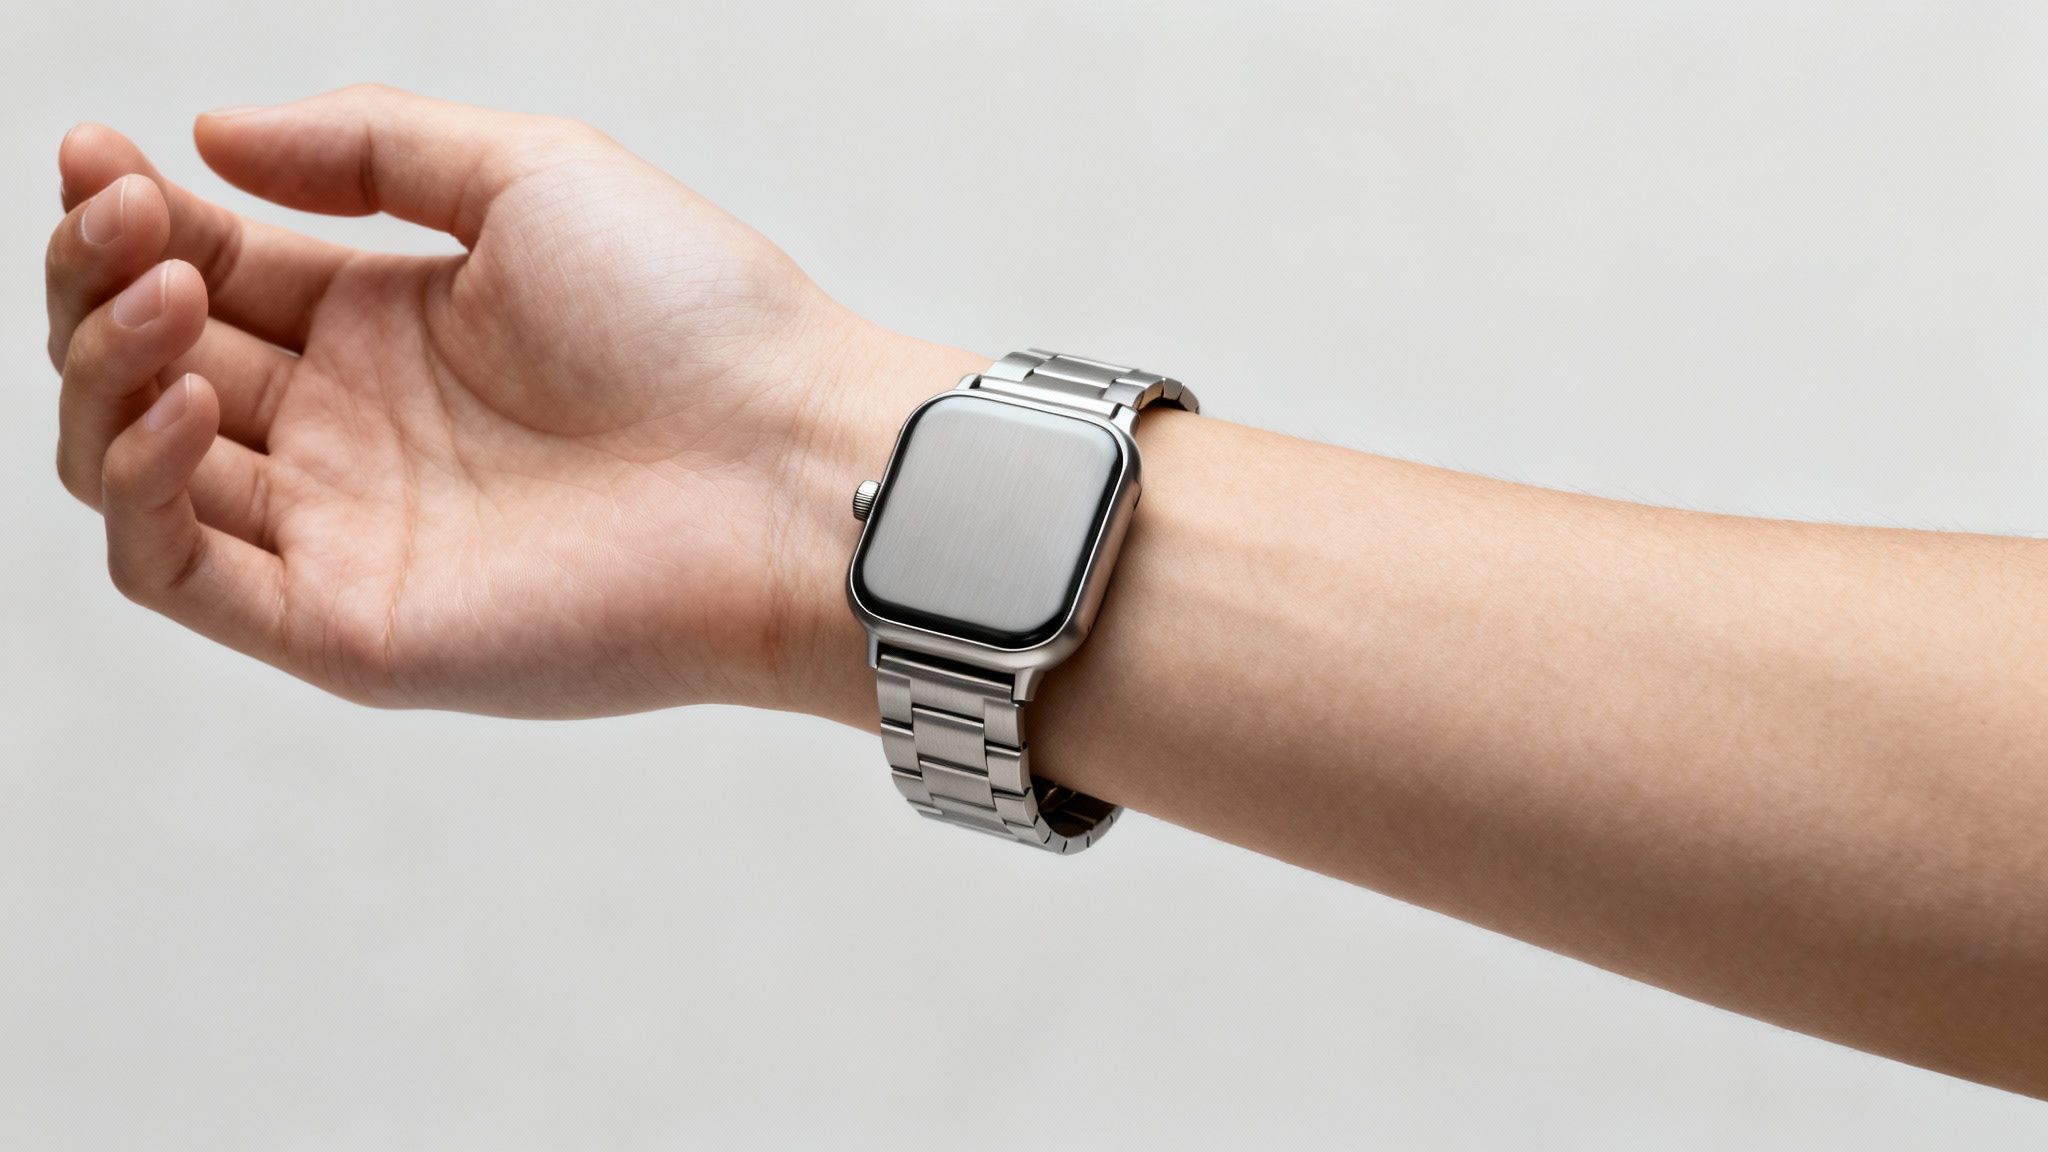
Getting the right fit is about striking a delicate balance between comfort and function. A band that flops around can cause your smartwatch to miss vital readings, like your heart rate, or fail to deliver notifications properly. On the other hand, a band that digs into your skin is a nuisance you don’t need.
The good news is that a quick adjustment is all it takes to get it sitting perfectly. It's a skill more and more people are picking up. With the explosion of smartwatches in the UK, resizing a band at home has become a fairly common task. The UK's smartwatch market is set to hit around US$1.17 billion in 2025, which means millions of us will be looking to get that ideal fit.
Finding Your Ideal Fit
Before you grab your tools, you need to figure out how many links to take out. The golden rule I always follow is to aim for a fit where you can comfortably slide one finger between the band and your wrist. This sweet spot ensures the watch is secure enough for the sensors to work, but not so tight that it restricts your movement.
Knowing your precise wrist measurement is a huge help here. If you're unsure, it’s worth taking a moment to measure it correctly. We’ve put together a simple guide on how to measure wrist size for a watch that walks you through it.
Key Takeaway: A well-fitted band stops your watch from spinning around and keeps features like heart rate tracking and haptic feedback working correctly. Proper sizing is the first step to getting the most out of your smartwatch.
Taking the time to get this right makes a world of difference. Your watch will not only look better but also perform exactly as it was designed to.
2. Getting Your Tools Ready
Before you even think about popping out a link, you need to get your toolkit in order. Honestly, having the right gear is what separates a quick, satisfying five-minute job from a frustrating hour of scratching up your new watch band. You could always take it to a jeweller, but where’s the fun in that? Most metal bracelets are surprisingly easy to adjust at home.
Your best bet is to grab a dedicated watch band link removal kit. They’re cheap as chips online and come with everything you need for a professional-looking result.
Inside one of these kits, you’ll usually find a few key items. There's a small plastic band holding block, which has little slots to hold the bracelet steady while you work. You'll also get a pin pusher tool – essentially a handle with a very fine metal point for, you guessed it, pushing out the pins. Lastly, there's often a tiny hammer for those moments when a pin is being particularly stubborn and needs a gentle, persuasive tap.
What to Look for in a Kit (and What to Do in a Pinch)
When you're shopping for a kit, try to find one that comes with a few different sizes of pin pusher tips. You'd be surprised how much the pin diameter can vary between, say, a chunky Garmin Fenix band and a sleeker strap on a Samsung Galaxy Watch. The metal tools tend to feel a bit sturdier and give you more control than the flimsy plastic versions.
No kit? No problem. If you're feeling adventurous, you can cobble together a functional set of tools from things around the house. A thumbtack, a SIM card ejector tool from your phone box, or even a sturdy paperclip can stand in for a proper pin pusher. A block of soft wood or a folded-up tea towel can work as a makeshift holding block to protect your table.
My Two Cents: If you go the DIY route, do yourself a favour and put a bit of masking tape or painter's tape on the links next to the one you're working on. It’s a simple trick that acts as a buffer and seriously reduces the chances of an "oops, I just gouged my new watch" moment.
Essential Tools for Watch Band Link Removal
To make it dead simple, here’s a quick-glance guide to the tools you'll need and what they're actually for.
| Tool | Primary Use | Pro Tip |
|---|---|---|
| Pin Pusher Tool | Applies targeted pressure to push a link pin out of its channel. | Look for one with interchangeable tips to match the pin size of your specific watch band. |
| Band Holding Block | Holds the watch band securely in place, aligning the pin for removal. | The slots also give the pin a place to go, preventing it from getting bent as you push it out. |
| Small Hammer | Gently taps the pin pusher to dislodge stubborn or tightly-seated pins. | Use light, quick taps. Brute force is your enemy here and can damage the link or the pin. |
Having everything laid out and ready before you start is half the battle. It lets you work calmly and methodically, which is the key to avoiding lost pins and accidental scratches. A little prep goes a long way in making sure your watch not only fits perfectly but also stays looking brand new.
Removing Links From Different Watch Band Types
Not all watch bracelets are built the same, and figuring out which link system you’re dealing with is the first step to a successful adjustment. Get this right, and you can tackle the job with confidence, knowing you won’t damage your favourite watch. We'll walk through the most common types you're likely to come across, from simple friction pins to more complex setups.
A Quick Word on Sizing Strategy
Before you start popping out pins, it's worth thinking about which links to remove. A rookie mistake I see all the time is taking all the links from just one side of the clasp. This completely throws off the balance of the watch on your wrist, causing the heavy watch head to constantly slide towards the outside.
To keep everything centred and comfortable, you should always aim to remove an equal number of links from both sides of the clasp. If you need to remove an odd number—say, three links—your best bet is to take two from one side and one from the other. This simple practice ensures the clasp sits squarely on the underside of your wrist where it belongs.
This image shows the basic tools you'll need and how they come together for a standard pin removal.
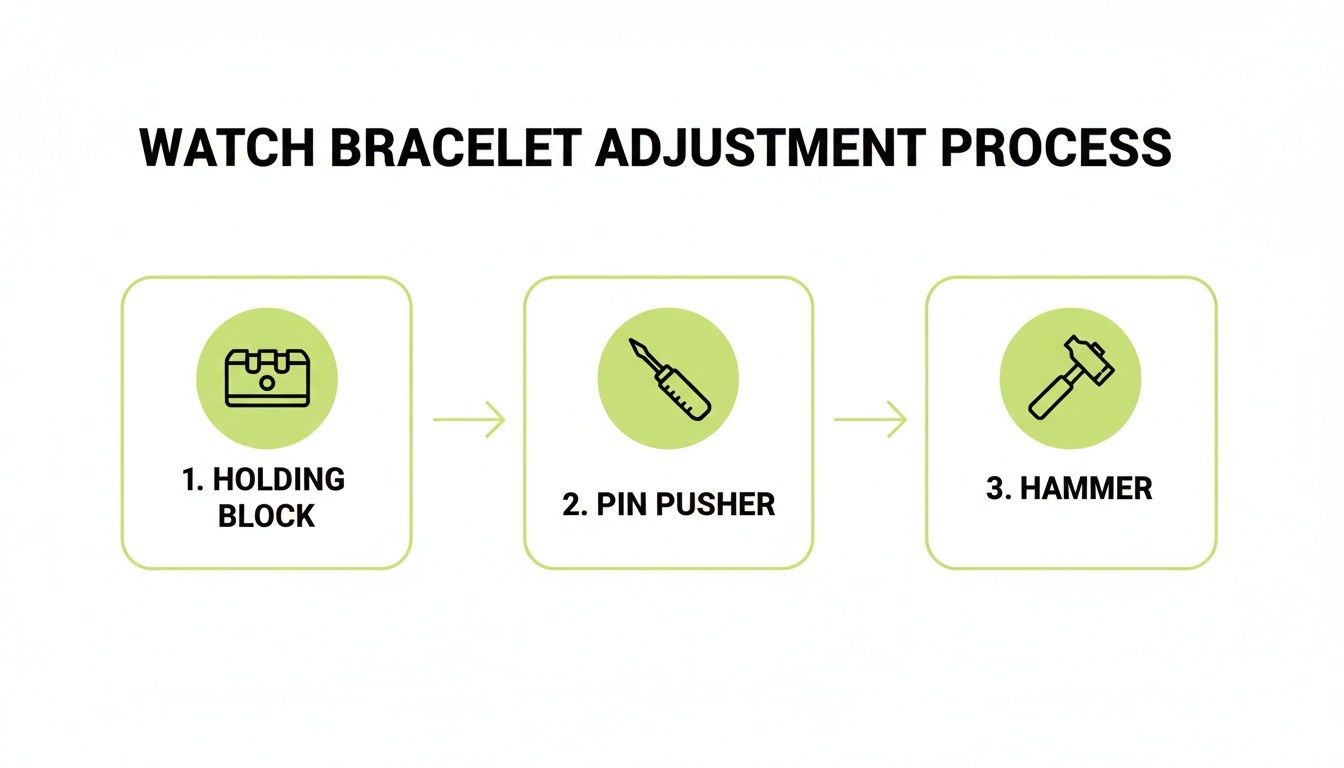
You can see how the holding block secures the band, allowing the pin pusher and hammer to work together to safely pop the pin out.
The Common Friction Pin System
This is the system you'll find on the vast majority of metal watch bands. It’s a straightforward design that uses a friction pin (sometimes called a split pin or cotter pin) which is slightly split at one end. That split creates just enough tension to hold the link securely in place.
Take a close look at the inside of your watch band. On the links that are removable, you should see tiny arrows stamped into the metal. These arrows are your map—they show you the exact direction to push the pin out. Always, always push in the direction of the arrow.
To get a friction pin out:
- Settle your band into the holding block, lining up the pin you want to remove directly over one of the slots.
- Take your pin pusher tool and place its tip on the head of the pin (the end opposite the arrow).
- Apply firm, steady pressure. If the pin is a bit stubborn, a few gentle taps on the end of the pusher with your small hammer should do the trick.
- Once the pin is out, the link will come away easily.
For a deeper dive into the nuances of different bracelet styles, check out this comprehensive guide on sizing various watch bracelet types.
Tackling Screw-In Links
You'll typically find screw-in links on higher-end or chunkier dive watches. As the name suggests, these links are held together by a tiny, threaded screw instead of a friction pin. It's a very secure system, but it requires a slightly different technique.
You’ll need a good quality jeweller's screwdriver that fits the screw head perfectly. Trust me on this one—using a screwdriver that's too big or too small is the fastest way to strip the screw head and turn a five-minute job into a massive headache.
Pro Tip: Before you start, place a small piece of clear tape or painter’s tape over the links on either side of the screw you're working on. This simple trick provides an excellent buffer against accidental slips and scratches from your screwdriver.
From there, it's just a matter of unscrewing the pin to release the link. Remember the old saying: lefty-loosy, righty-tighty.
The Notorious Pin-and-Collar System
This system is a bit more fiddly and is famously used by brands like Seiko and Citizen. It's a three-part affair: you have the pin, the link itself, and a minuscule, separate tube called a collar (or ferrule). This tiny collar sits inside the centre barrel of the link and creates the friction that holds the main pin in place.
The removal process starts just like a standard friction pin—you find the arrow and push the pin out in that direction. The critical difference here is keeping track of that tiny collar. It is incredibly easy to lose, and without it, the pin has nothing to grip onto and will simply fall out.
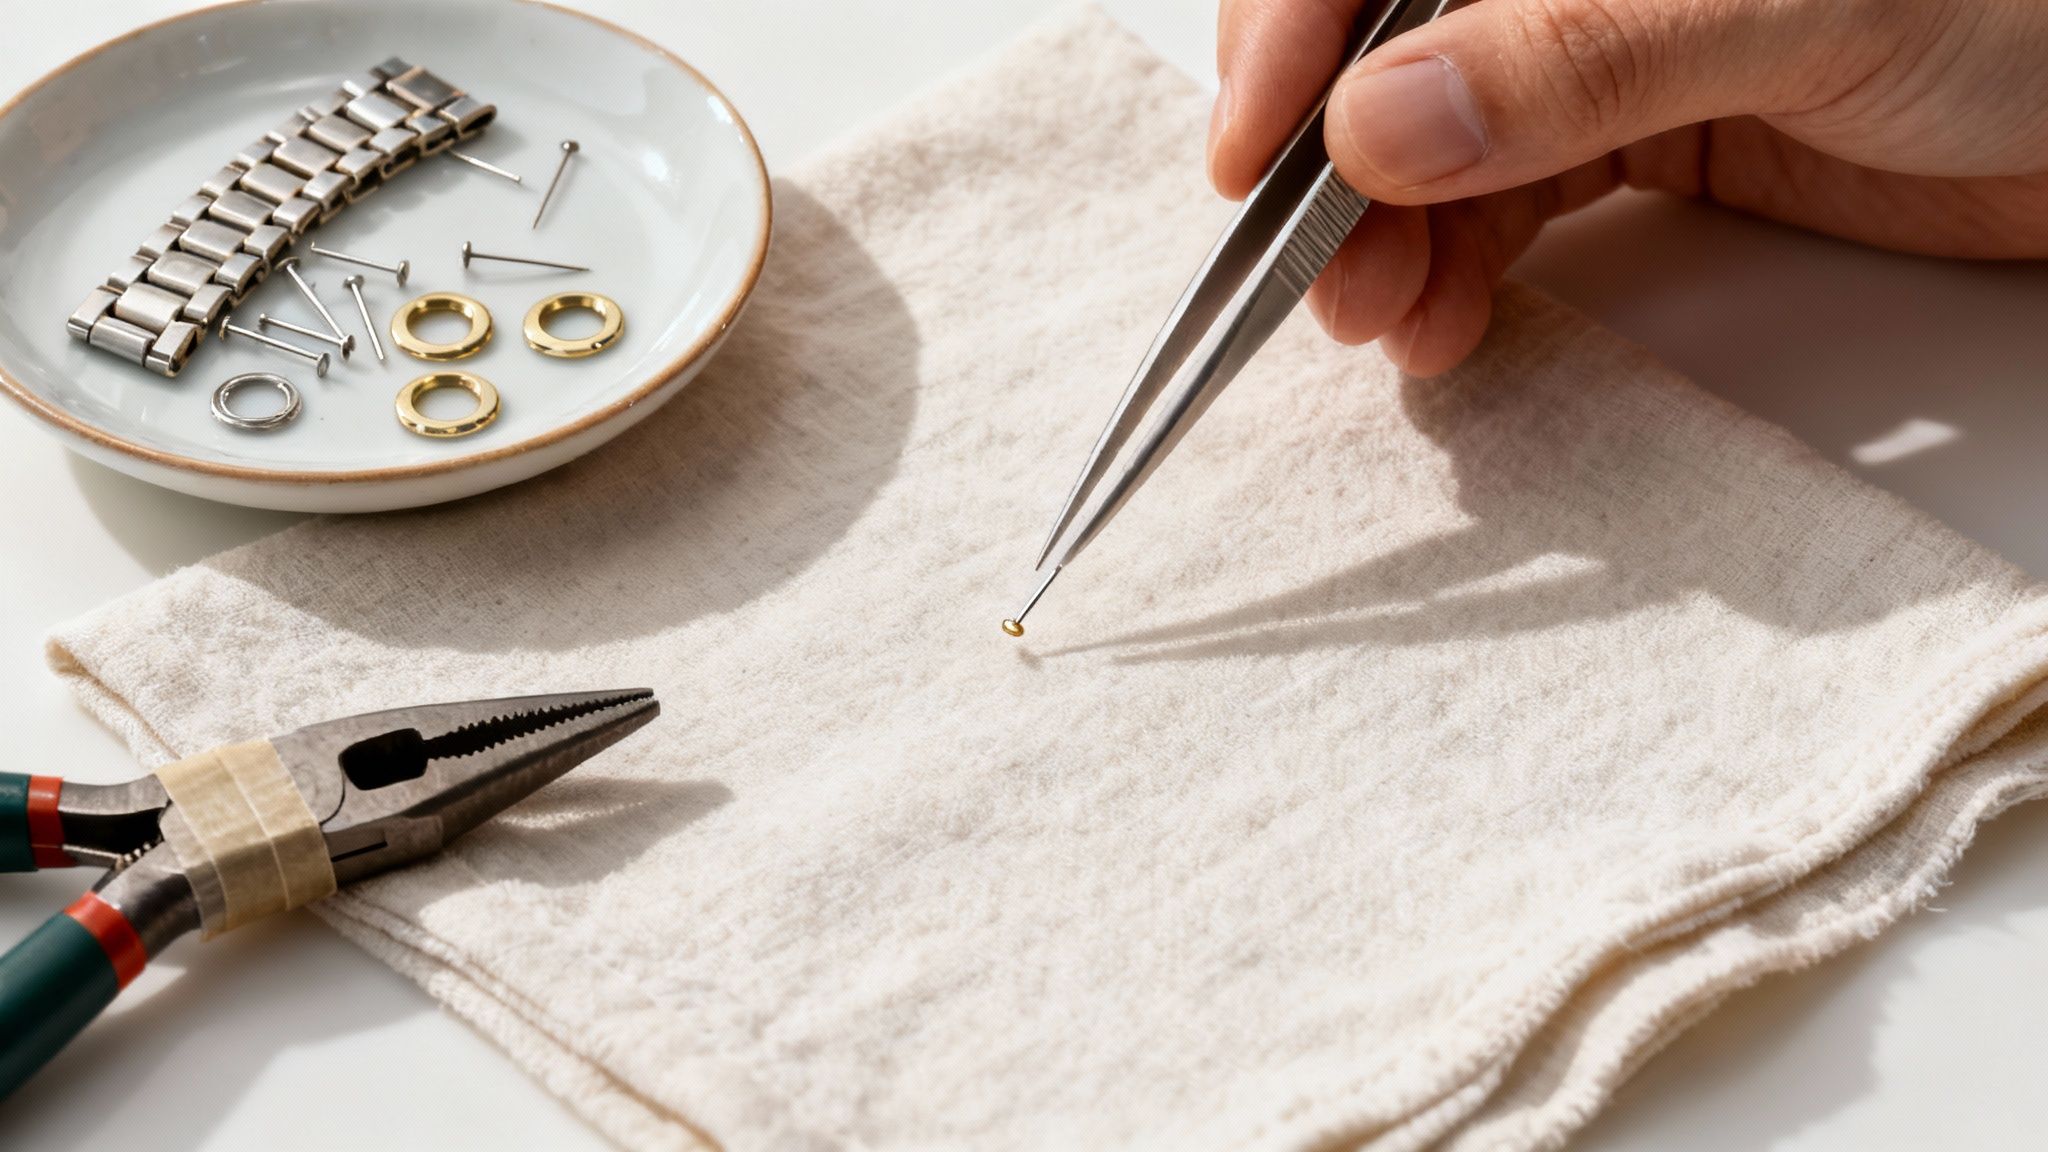
When you push the pin out, the collar will either fall out with it or remain lodged inside the link piece you’ve just removed. I highly recommend working over a light-coloured cloth or mat to make spotting any runaway parts much easier. When you're putting it all back together, make sure the collar is seated back in its slot before you reinsert the pin.
If you’re feeling a bit lost, our detailed guide on how to adjust a metal watch strap has some great visuals that really help clarify how this system works.
Adjusting Modern Smartwatch Bands
While traditional metal watch bands still have their place, the smartwatch world has thankfully moved things forward with some really clever, tool-free adjustment systems. Brands like Apple, Garmin, and Samsung have come up with bands that you can resize in seconds, often using nothing more than your fingertips. It’s a huge improvement over squinting at tiny pins and screws.
Getting to grips with these modern designs is the secret to getting a perfect fit from your high-tech watch. You need it snug enough for the heart rate and other sensors to work properly, but comfortable enough to wear all day, from your morning run to your desk and back again.
Apple's Button Release Link Bracelet
Apple's own Link Bracelet is a brilliant piece of engineering that showcases just how simple resizing can be. Instead of fiddly pins, each link you can remove has a small, oval-shaped button on the inside of the band. It’s one of the best examples I've seen of how to remove watch band links with absolutely zero drama.
The process couldn't be easier:
- Find the button on the link you want to take out.
- Just press and hold it. You'll feel a little click.
- While holding the button, the link will just slide apart from the next one.
- Pop out as many as you need to get that perfect, custom fit.
You can do the whole thing in less than a minute with no risk of scratching the bracelet or losing tiny parts. If you're a fan of Apple's other bands, our guide to the Milanese Apple Watch band is well worth a read. And for anyone curious about the tech packed inside, this in-depth Apple Watch Series 6 teardown offers a fascinating look under the hood.
Garmin QuickFit and Micro-Adjustments
Garmin has also made convenience a top priority, which makes sense given its focus on athletes and outdoor enthusiasts. Their QuickFit system is fantastic; it uses a simple latch that lets you swap the entire band in a couple of seconds. This is perfect for switching from a practical silicone band for a workout to a smarter metal one for a night out.
Looking beyond just swapping bands, many of Garmin’s higher-end metal bracelets now include micro-adjustment settings built right into the clasp. These are usually small sliders or spring-loaded buttons that let you tweak the fit on the fly, without having to mess with the links.
This is an absolute game-changer for anyone who’s active. A band that feels fine at the start of a long run can feel uncomfortably tight as your wrist naturally swells. A quick press of a button provides instant relief without breaking your stride.
For those of us in the UK with premium smartwatches, getting the fit right isn’t just about comfort—it's about performance. A band that's just one or two links too loose can throw off sensor readings, while one link too tight can cause nasty skin irritation. This is a big deal, especially when you're wearing a device for 20+ hours a day. Thankfully, these modern systems make finding that perfect balance easier than it has ever been.
Troubleshooting Common Watch Band Issues
Even with the steadiest of hands, you’ll eventually run into a snag. A pin just won't budge, you strip a screw head, or a tiny collar pings off into another dimension. Don’t panic—these are common headaches when you're learning how to remove watch band links, and they're almost always fixable with a bit of patience.
Think of this as your contingency plan. Knowing how to handle these little setbacks will keep you from getting frustrated and help you get the job done right.
Solving a Stuck Pin or Screw
A pin that’s completely seized in the link is probably the most common problem you'll face. It could be a tight factory fit, or maybe just a bit of accumulated grime. Before you go reaching for a bigger hammer, try putting a tiny drop of lubricating oil (something like WD-40) on both ends of the pin. Give it a few minutes to work its magic.
If it's still playing stubborn, here are a couple of things I've found work well:
- Gentle Persuasion: Grab your small hammer and pin pusher. Instead of one big whack, try a series of firm, rapid taps. The vibration from these quick strikes is often far more effective at dislodging a stuck pin than brute force.
- The Pliers Trick: If you’ve managed to get the pin partway out but it’s stuck, wrap the tips of your needle-nose pliers in a bit of masking tape to avoid scratching the band. Grip the exposed end of the pin firmly and use a gentle wiggling and pulling motion to ease it out the rest of the way.
The Runaway Collar or Lost Pin
This happens to the best of us. You push a pin out of a pin-and-collar system, and that minuscule collar disappears. It's incredibly frustrating, but a little bit of prep can save you a world of pain.
My Essential Rule: Always work on a clean, light-coloured surface. A white tea towel or even just a plain sheet of A4 paper is perfect. It makes those tiny silver or black parts instantly visible, turning a potential disaster into a minor inconvenience.
I also like to keep a small magnetic dish or a simple saucer on my workspace. The second a pin, screw, or collar comes out, it goes straight into the dish. This one habit will save you countless minutes spent crawling around on the floor with your phone's torch.
Getting these practical skills down is becoming more and more important for UK smartwatch owners. A perfect fit is key to the whole experience, especially as the UK wearables market is projected to hit £1.29 billion in 2025. People rightly expect comfort and usability, which makes being able to do these at-home adjustments a massive plus. You can dig deeper into this trend by reading the latest UK smartwatches and wearable technology market report.
Got Questions About Removing Watch Links? We’ve Got Answers.
Taking on a watch band adjustment yourself for the first time can feel a bit daunting, but it's one of the most rewarding bits of DIY you can learn. As you get ready to dive in, you'll probably have a few questions. Let's tackle some of the most common ones that come up, so you can move forward with confidence.
Can I Really Do This Myself, or Should I Go to a Jeweller?
This is probably the number one question, and the answer is almost always: yes, you absolutely can do this at home. The vast majority of watch bands, especially the common ones using simple friction pins, are designed to be adjusted. All it takes is a basic watch tool kit and a bit of patience.
How Many Links Should I Actually Take Out?
Figuring out the right number of links to remove can feel like guesswork, but there’s a simple trick. A good rule of thumb is to aim for a fit where you can just slip your index finger between the clasp and your wrist. This gives you a snug fit that's comfortable and allows smartwatch sensors to work properly, without cutting off your circulation.
Putting It All Back Together
Okay, you've got the links out, now what? Reassembling the band is just a case of reversing the process. Line up the link holes, pop any collars back in if your band uses them, and then carefully tap the pin back into place.
Expert Tip: This is the crucial part. Always reinsert the pin in the opposite direction of the arrow on the link. This ensures the split end of the pin goes in last, locking it securely into the link.
What Should I Do with the Spare Links?
Whatever you do, don't throw them away! Your wrist size can fluctuate with the seasons or over time. Pop those extra links, pins, and collars into a small, clearly labelled bag and store them somewhere safe. You'll be glad you did when you need to make an adjustment down the road.
Help! The Pin Feels Loose After I Put It Back In.
This can happen, especially with older watches where the pins have seen a lot of action. A loose pin usually means the tiny split end has lost its tension and isn't gripping the inside of the link anymore. The good news is that replacement pins (often called cotter pins) are easy to find online and very inexpensive. It’s a quick fix.
Is There a Risk I Could Damage My Watch?
While there's always a slight risk of a slip-up, you can protect your watch easily. Work slowly on a soft, padded surface like a microfibre cloth. For extra peace of mind, you can apply a small piece of painter's tape to the links next to the one you're working on to prevent any accidental scratches.
Ready to find a band that fits you perfectly from day one? Explore the premium collection at Nothing But Bands, where style meets comfort for every smartwatch. Find your perfect strap at https://nothingbutbands.com.